
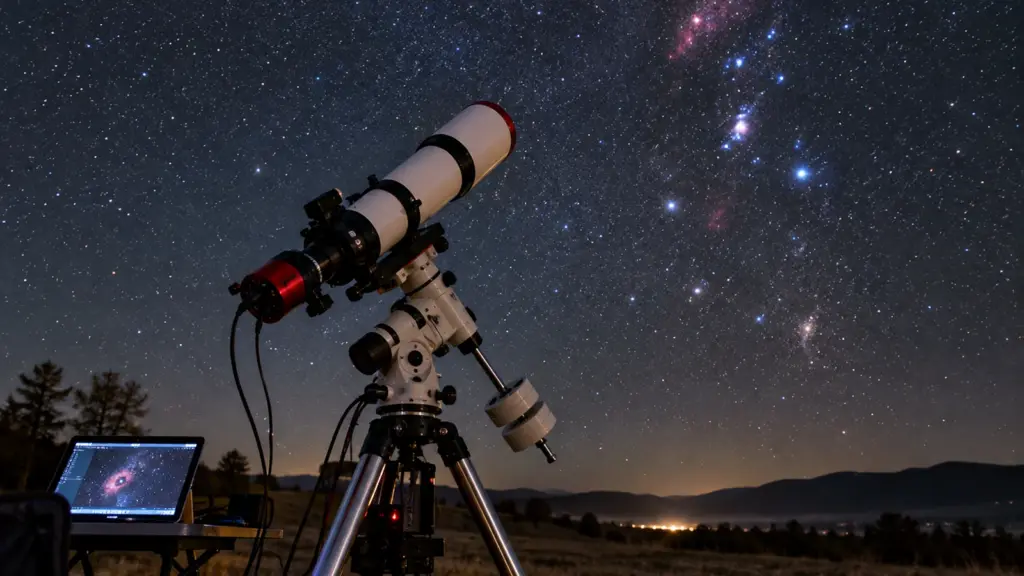
Photographing the night sky can be surprisingly frustrating for beginners. You point your camera toward a beautiful nebula, galaxy, or star-filled sky, take a long exposure, and expect to capture something spectacular. Instead, the photograph might look dark, grainy, or filled with colorful speckles. The celestial object you hoped to capture may be barely visible.
This happens because deep-sky astrophotography involves collecting extremely small amounts of light. Many distant astronomical objects are so faint that a camera cannot record a clean, detailed image in a single practical exposure.
Fortunately, astrophotography image stacking offers a powerful solution. Instead of relying on one photograph, you capture multiple exposures of the same region of the sky and combine them using specialized software. This process improves the signal-to-noise ratio, helping faint astronomical structures become easier to reveal during image processing.
Image stacking is widely used by amateur astrophotographers and professional astronomers. It is an essential part of modern digital astronomy because it allows observers to accumulate useful image data while managing the limitations of cameras, optical systems, and tracking equipment.[1]
You do not necessarily need an expensive telescope or sophisticated observatory to begin. A DSLR or mirrorless camera, a suitable lens, a stable tripod, and free image-processing software can be enough to learn the fundamentals.
This guide explains image stacking from the ground up, including the science behind it, the different types of calibration frames, how to capture suitable exposures, and how to stack astrophotography images using Siril. You will also learn how to process the resulting image, avoid common mistakes, and decide when more advanced techniques are worth exploring.
1. What Is Image Stacking in Astrophotography?
Astrophotography image stacking is the process of combining multiple photographs of the same astronomical target into a single image. The individual photographs are usually called light frames or subexposures.
Before the images can be combined correctly, software must account for movement between exposures. Stars may shift slightly because of imperfect tracking, the Earth’s rotation, or intentional camera movements. The software aligns corresponding stars and other features, then combines the pixel information using a mathematical integration method.
The result is not simply a brighter photograph. More importantly, stacking can improve the reliability of the recorded signal relative to random noise, giving you more flexibility when revealing faint celestial objects.
Why Does a Single Night-Sky Photograph Often Look Noisy?
A normal daytime photograph receives a relatively large amount of light, allowing a camera to record details with comparatively little visible noise. Deep-sky photography is different because many nebulae and galaxies deliver only a small number of detectable photons to each sensor pixel during an exposure.
As the camera records this weak signal, it also records unwanted fluctuations. These include photon shot noise, electronic read noise, dark-current noise, and background noise associated with the brightness of the night sky.
The camera sensor may also have fixed imperfections that produce hot pixels or repeating patterns.
When you increase the brightness of a faint single exposure during editing, the astronomical signal becomes more visible, but so does the noise. A dark background may begin to look grainy or blotchy, and faint structures can remain difficult to distinguish.
How Does Combining Multiple Exposures Produce a Cleaner Image?
Imagine photographing the Andromeda Galaxy twenty times without significantly changing your framing. Each exposure records light from the same galaxy, but the random noise varies between images.
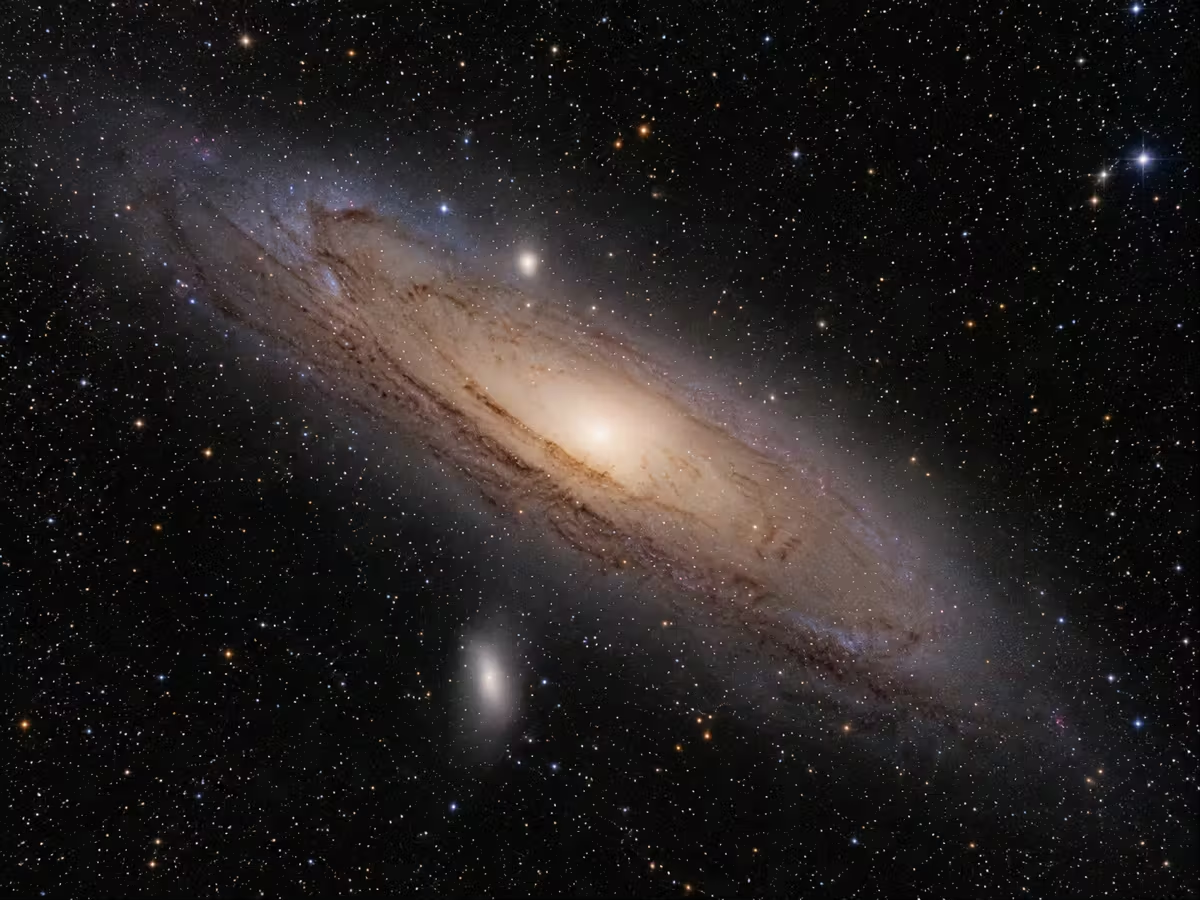
When stacking software aligns the galaxy and averages the corresponding pixel values, the real astronomical signal is reinforced statistically. Random positive and negative fluctuations are less likely to persist at the same strength in the combined result.
The software can also use rejection methods to identify certain abnormal pixel values caused by satellite trails, cosmic-ray events, or sensor defects.
The important condition is that the images must be aligned correctly and contain genuine usable signal. Stacking a large number of badly blurred or incorrectly exposed images does not automatically produce a good result.
Understanding Signal-to-Noise Ratio
The signal-to-noise ratio, commonly abbreviated as SNR, describes the strength of useful information relative to unwanted statistical fluctuations.
In astrophotography, signal represents detected light from astronomical objects, while noise describes uncertainty in the measured values. Several sources contribute to the final noise budget, including shot noise from the target, sky background, dark current, and camera readout.
For independent exposures of similar quality and duration, with comparable noise characteristics, the improvement in SNR from averaging multiple frames approximately follows:
SNR improvement = √N
Here, N represents the number of combined exposures.
For example:
| Number of equivalent exposures | Approximate SNR multiplier |
|---|---|
| 1 | 1.0× |
| 4 | 2.0× |
| 9 | 3.0× |
| 16 | 4.0× |
| 25 | 5.0× |
| 100 | 10.0× |
This relationship explains why additional exposures are valuable, but also why improvements become progressively slower.
To double the SNR again, you generally need four times as many equivalent exposures, assuming the conditions remain comparable. The actual result depends on exposure duration, sky brightness, sensor characteristics, and correlated noise.[1] [2]
Image Stacking vs. a Single Long Exposure
A beginner might wonder whether ten one-minute photographs are equivalent to one ten-minute photograph.
Both provide ten minutes of nominal integration time, but they are not necessarily identical.
Every time a camera reads the sensor, it introduces read noise. Ten separate exposures therefore contain more readout events than one continuous exposure. Under read-noise-limited conditions, fewer longer subexposures can offer an advantage.
However, long exposures create other problems. Tracking errors can produce elongated stars, bright objects may saturate, and light pollution can push the sky background toward the sensor’s usable limits.
Multiple shorter exposures reduce the risk of losing an entire session to one ruined photograph. They also make it possible to exclude frames affected by passing clouds, wind, or tracking problems.
The goal is to choose a subexposure duration appropriate for the camera, sky, target, and tracking system, then accumulate enough total usable integration time.[2]
2. What Can Image Stacking Improve, and What Can It Not Fix?
Image stacking is one of the most useful techniques in digital astrophotography, but it is not a universal correction tool. Understanding its strengths and limitations prevents unrealistic expectations and helps photographers focus on improving the original exposures.
It is particularly effective at reducing the relative visibility of random noise and supporting the detection of faint structures. Other problems, including severe focus errors and missing image information, require different solutions.
Reducing Random Noise and Revealing Faint Astronomical Structures
The most important benefit of stacking is improved signal-to-noise ratio.
As more usable astronomical data is integrated, small differences in brightness become easier to distinguish from random fluctuations. This can reveal faint galaxy extensions, subtle nebular clouds, and dim stars that would be difficult to process from one exposure.
A cleaner image also tolerates more careful stretching because the background fluctuations are less dominant.
However, stacking does not increase the physical number of photons recorded in each original exposure. The additional information comes from combining the observations made across the full imaging session.
Correcting Hot Pixels, Satellite Trails, and Other Artifacts
Certain unwanted features can be reduced during calibration or stacking.
Hot pixels are sensor locations that produce unusually high values. Appropriate dark-frame calibration and pixel correction can reduce their impact. When the camera is dithered between exposures, remaining fixed sensor defects shift relative to the stars and become easier to distinguish.
Satellite trails and occasional aircraft trails can sometimes be suppressed using statistical rejection methods. These algorithms identify measurements that differ significantly from the expected value at a given aligned pixel.
Success depends on having enough suitable frames and choosing appropriate rejection parameters. A trail covering a substantial fraction of the available observations may not disappear completely.
Why Stacking Cannot Repair Every Bad Photograph
Stacking cannot restore information that was never recorded.
If every exposure is severely out of focus, combining them will not create correctly focused stars. Similarly, if bright stars or a galaxy core have saturated, the clipped highlights cannot be recovered from those same saturated frames.
Stacking also cannot completely remove light pollution. A brighter sky contributes additional photon shot noise that remains present even after background-gradient correction.
Likewise, registration can align star positions, but it cannot fully reverse severe motion blur within individual exposures.
Better image acquisition remains the foundation of successful stacking. Software works best when it receives a collection of reasonably sharp, correctly exposed photographs.
3. Equipment and Software Needed for Image Stacking
One of the most encouraging aspects of astrophotography is that beginners can learn stacking without owning specialized astronomical equipment. The essential requirements are a camera capable of collecting multiple exposures, a sufficiently stable setup, and software that can align and integrate the images.
A tracking mount and telescope can expand your capabilities, but they are not prerequisites for understanding the workflow. It is usually better to begin with manageable equipment and learn why each component matters.
Can You Stack Astrophotography Images Without a Telescope?
Yes. A DSLR or mirrorless camera fitted with a suitable lens can capture wide-field images of star clusters, bright nebulae, large galaxies, and the Milky Way.
A wide-angle lens is particularly useful when photographing large sections of the sky. It allows longer untracked exposures before star movement becomes obvious compared with a longer focal-length lens using the same camera.
A telephoto lens can capture smaller subjects, but accurate tracking becomes increasingly important as focal length increases.
The key requirement is consistency. Your exposures should cover the same region of the sky with enough overlapping stars for the software to align them.
Cameras, Telescopes, Star Trackers, and Equatorial Mounts
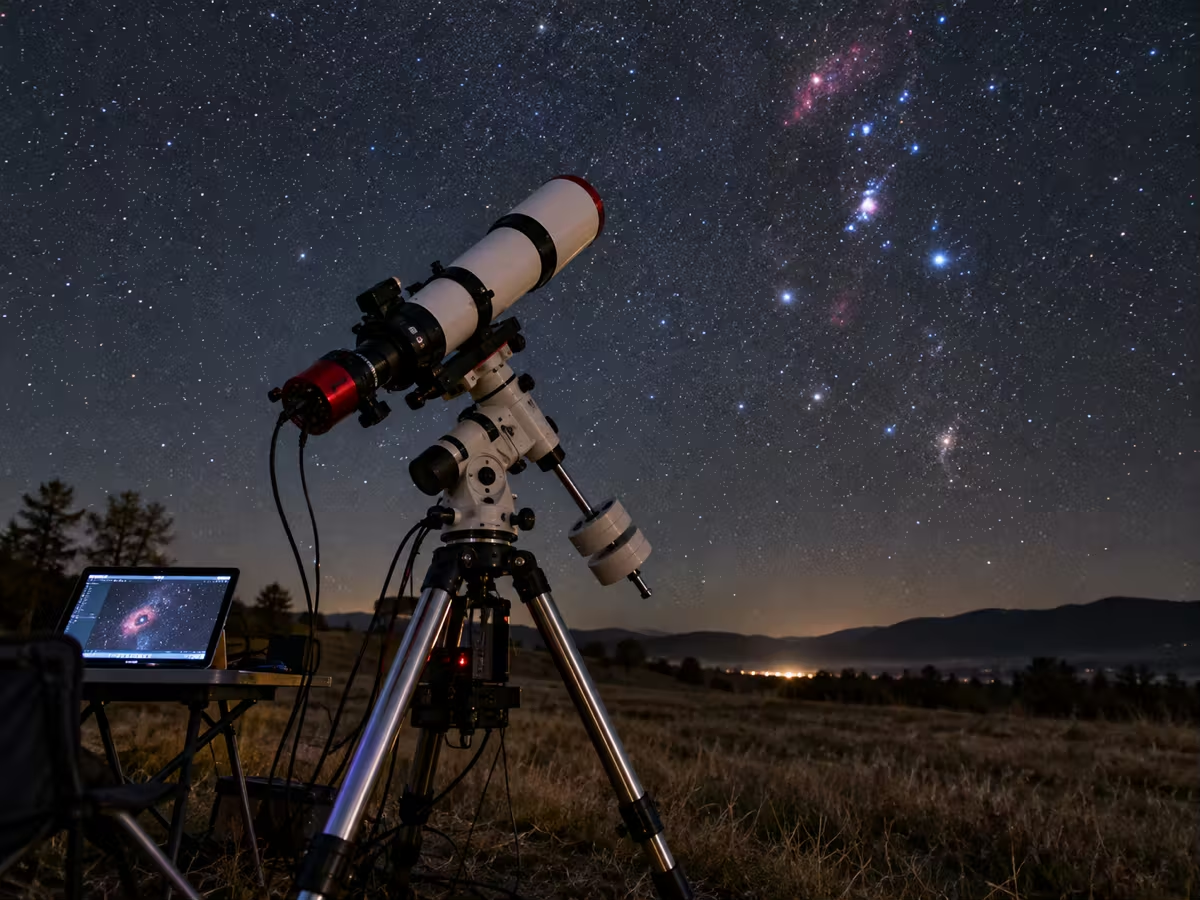
A camera determines how incoming light is recorded, while the lens or telescope collects and focuses that light onto the sensor.
An equatorial tracking mount compensates for Earth’s rotation by moving the camera or telescope at approximately the sidereal rate. This allows longer exposures while keeping stars close to their original sensor positions.
A star tracker performs a similar function for relatively lightweight camera equipment. More advanced equatorial mounts can carry larger telescopes and may support autoguiding.
Tracking quality matters because stars are moving relative to a stationary camera throughout the night.
A stable mount does not automatically guarantee sharp photographs. Polar alignment, balance, mechanical performance, focus, and environmental conditions all contribute to the final result.
Choosing Your First Stacking Software
Several applications support astrophotography image stacking, but their capabilities and preferred workflows differ.
For this guide, Siril is the primary application because it combines free astronomical image processing with calibration, registration, stacking, and post-processing tools.
| Software | Main purpose | Cost model | Best suited for |
|---|---|---|---|
| Siril | Deep-sky calibration, stacking, and processing | Free, open source | Beginners through advanced users |
| DeepSkyStacker | Deep-sky registration and stacking | Free, open source | Straightforward stacking workflows |
| PixInsight | Comprehensive astronomical image processing | Commercial | Advanced processing and automation |
| Astro Pixel Processor | Calibration, integration, mosaics, and processing | Commercial | Integrated deep-sky workflows |
| AutoStakkert! | Planetary, lunar, and solar frame stacking | Free | Lucky imaging |
| Sequator | Wide-field and nightscape stacking | Free | Untracked night-sky photography |
Platform support and available versions may change. The official software websites should be checked before installation.
Siril supports Windows, macOS, and Linux. Its official download page listed version 1.4.4 as the current stable release when this guide was researched in October 2026.[3]
Understanding Computer, Memory, and Storage Requirements
Stacking software processes large amounts of image data, particularly when working with high-resolution cameras.
A single RAW photograph may occupy tens of megabytes. During processing, software can create converted FITS images, calibration masters, registered sequences, temporary files, and the final stack.
These intermediate files can require considerably more storage than the original images.
Adequate RAM helps processing performance, while an SSD can improve file access when converting and integrating large datasets.
Beginners should keep their original photographs separate from temporary processing files. This makes it easier to delete intermediate data later without accidentally losing the source exposures.
4. Planning and Capturing Images for Successful Stacking
Image quality begins long before the stacking software is opened. A well-organized imaging session provides the software with consistent, properly exposed, sharply focused frames that can be combined reliably.
Successful acquisition requires choosing a target appropriate for your equipment, understanding exposure settings, and collecting enough usable integration time. These decisions can influence the final image more than complicated post-processing techniques.
Choosing a Beginner-Friendly Astronomical Target
A suitable first target should be reasonably bright, easy to locate, and large enough to photograph with your existing equipment.
The Orion Nebula, also known as Messier 42, is a popular target because its bright central region can be recorded with modest equipment when it is visible in the night sky.
The Andromeda Galaxy, Messier 31, is another suitable target for a camera and telephoto lens or a small telescope. Its extended structure provides an excellent opportunity to see how additional integration time improves faint details.
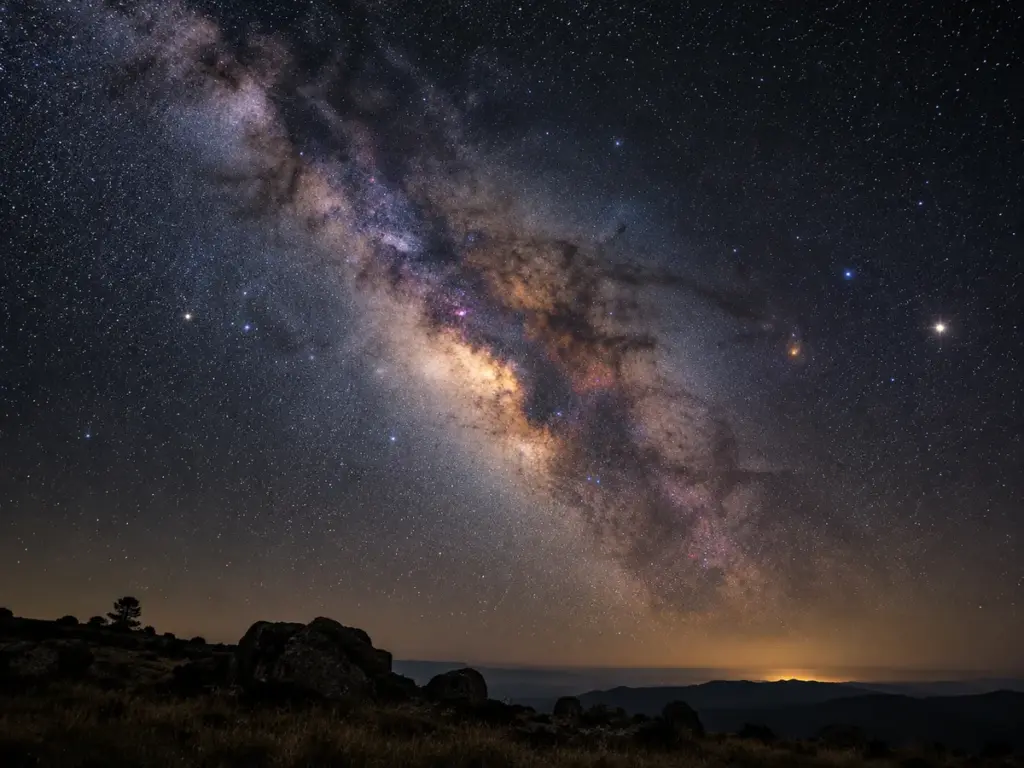
Wide-field star fields and Milky Way regions are useful for beginners working with short focal lengths.
Target selection should consider your hemisphere, season, sky darkness, local horizon, and the focal length of your imaging system.
Selecting Exposure Time, ISO, Gain, and Aperture
There is no single exposure setting that works for every astrophotography setup.
Exposure duration depends on the brightness of the sky, the target, tracking accuracy, focal length, optical aperture, and sensor characteristics.
A wider lens aperture generally allows more light to reach the sensor over a given exposure, although the sharpness of the lens may change at different aperture settings.
ISO on a DSLR or mirrorless camera primarily changes the camera’s amplification and recording behavior. Increasing ISO does not increase the number of photons collected.
Dedicated astronomy cameras often use gain settings, which influence signal amplification, read-noise behavior, and usable dynamic range.
Instead of copying a universal setting, test a short exposure and inspect the stars and histogram. Avoid severe star trailing, excessive background brightness, and unnecessary highlight saturation.
How Many Images Should You Capture for Stacking?
The correct number depends on the duration and quality of each exposure.
For example, forty one-minute exposures provide forty minutes of nominal integration time. Forty five-minute exposures provide two hundred minutes.
These are very different datasets despite containing the same number of photographs.
The most useful quantity to track is therefore total usable integration time.
A short session containing twenty or thirty good exposures can be enough to learn the workflow, but faint deep-sky objects often benefit from much longer imaging sessions.
There is no scientifically meaningful universal minimum of ten, twenty, or one hundred photographs for every target.
Collecting more usable photons generally improves SNR, but the required integration depends on your camera, optics, sky conditions, and desired result.[2]
Focusing, Tracking, and Avoiding Star Trails
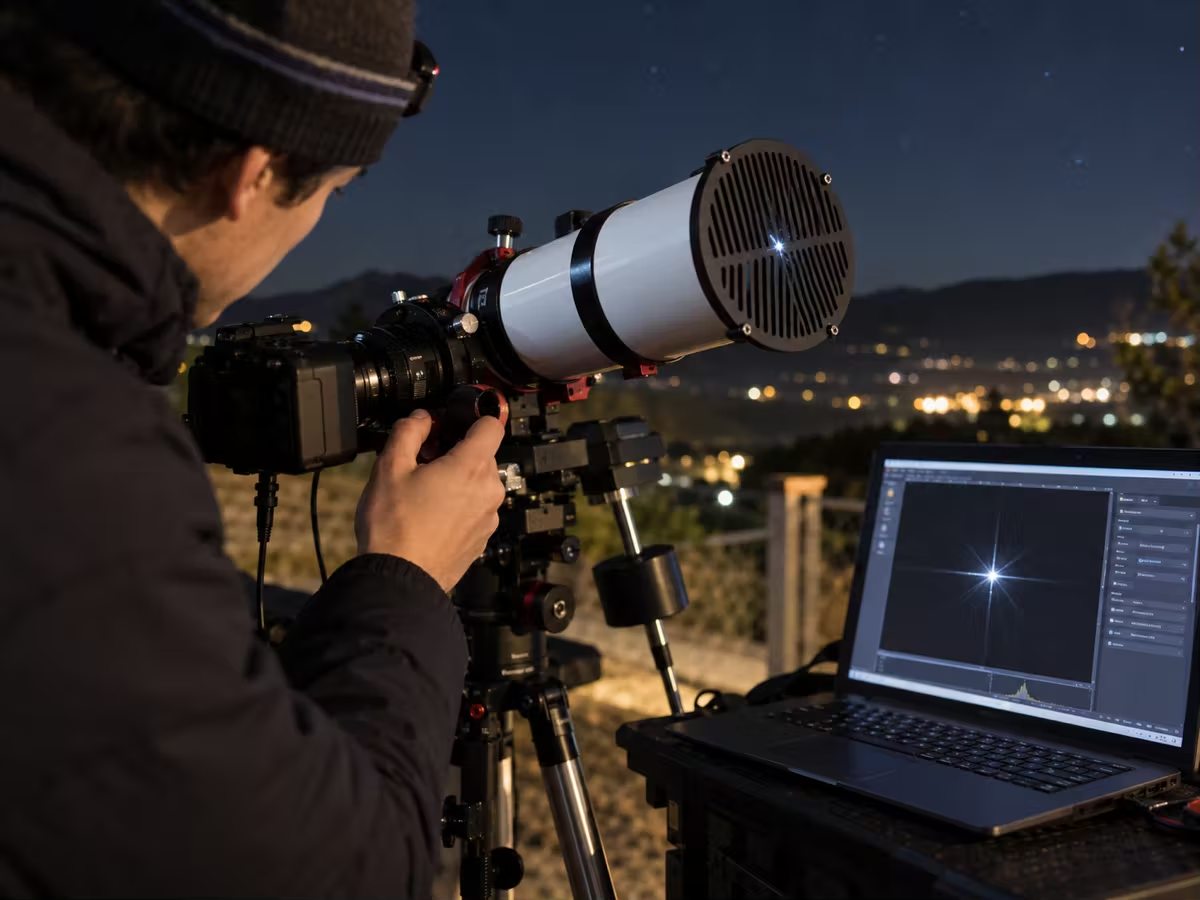
Accurate focus is essential because stars should appear as small, well-defined points rather than soft circles.
Many photographers use manual focus with live-view magnification on a bright star. A Bahtinov mask can also help when focusing through a suitable telescope.
After focusing, verify the result using a test exposure rather than relying only on the camera screen.
For tracked imaging, check polar alignment and whether stars remain round across the chosen exposure duration.
For untracked imaging, shorter exposures are generally required to control movement caused by Earth’s rotation.
Inspect several individual frames during the session. Catching a focus or tracking problem early is much more effective than discovering it after collecting hundreds of unusable exposures.
Why RAW Image Capture Is Preferable
RAW formats preserve camera sensor measurements with substantially less irreversible processing than a typical JPEG.
This is valuable because calibration and stacking depend on maintaining a predictable relationship between recorded pixel values and incoming light.
JPEG files generally include nonlinear tonal adjustments, lossy compression, reduced bit depth, and other camera-specific processing. These can make accurate calibration more difficult.
Dedicated astronomy cameras commonly save FITS images, which can preserve scientific image data and useful acquisition metadata.
For ordinary cameras, use a supported RAW format whenever possible.
Avoid applying contrast, sharpening, heavy noise reduction, or artistic color adjustments to individual exposures before calibration and stacking.
5. Understanding Light, Dark, Flat, Bias, and Dark-Flat Frames
Calibration frames are among the most misunderstood parts of beginner astrophotography. They are not additional photographs of the astronomical target. Instead, they measure unwanted signals or variations introduced by the camera and optical system.
Correct calibration helps separate those unwanted effects from the useful image data. However, different cameras and processing workflows require different combinations of calibration frames. Understanding their purpose is more valuable than blindly following a fixed number of exposures.
Light Frames: The Photographs Containing Your Target
Light frames are the actual photographs of the night sky that you want to combine.
They contain astronomical signal along with sky background, sensor noise, and optical imperfections.
For deep-sky stacking, light frames should generally use consistent acquisition settings and cover substantially the same target area.
The frames may shift slightly between exposures, especially when the mount is dithered, but the astronomical scene must remain recognizable for registration.
A collection of well-focused, properly exposed light frames provides the foundation of the final image.
Calibration frames can correct certain unwanted effects, but they cannot replace poor or insufficient light data.
Dark Frames: Measuring Dark Signal and Sensor Defects
Dark frames are photographs taken with no light reaching the camera sensor.
Their purpose is to measure unwanted sensor signals, including dark current, hot pixels, and certain electronic patterns.
For conventional dark calibration, the dark exposures should match the light frames in exposure duration, ISO or gain, relevant camera settings, and approximately sensor temperature.
Temperature is especially important because dark-current behavior can change significantly as the sensor becomes warmer.
A cooled astronomical camera can maintain a controlled sensor temperature, making dark-frame libraries practical.
With an uncooled DSLR, temperature matching is less predictable. Darks captured during or near the imaging session may provide a closer match.
Dark subtraction corrects the repeatable component of the dark signal, but does not eliminate the random shot noise associated with dark current.[4]
Flat Frames: Correcting Vignetting and Dust Shadows
Flat frames measure how evenly an optical system illuminates the sensor.
Many lenses and telescopes produce vignetting, where the corners of an image receive less light than the center. Dust particles near the sensor can also create darker shadows.
A properly acquired flat frame allows processing software to correct these variations by dividing the calibrated light data by a normalized flat-field response.
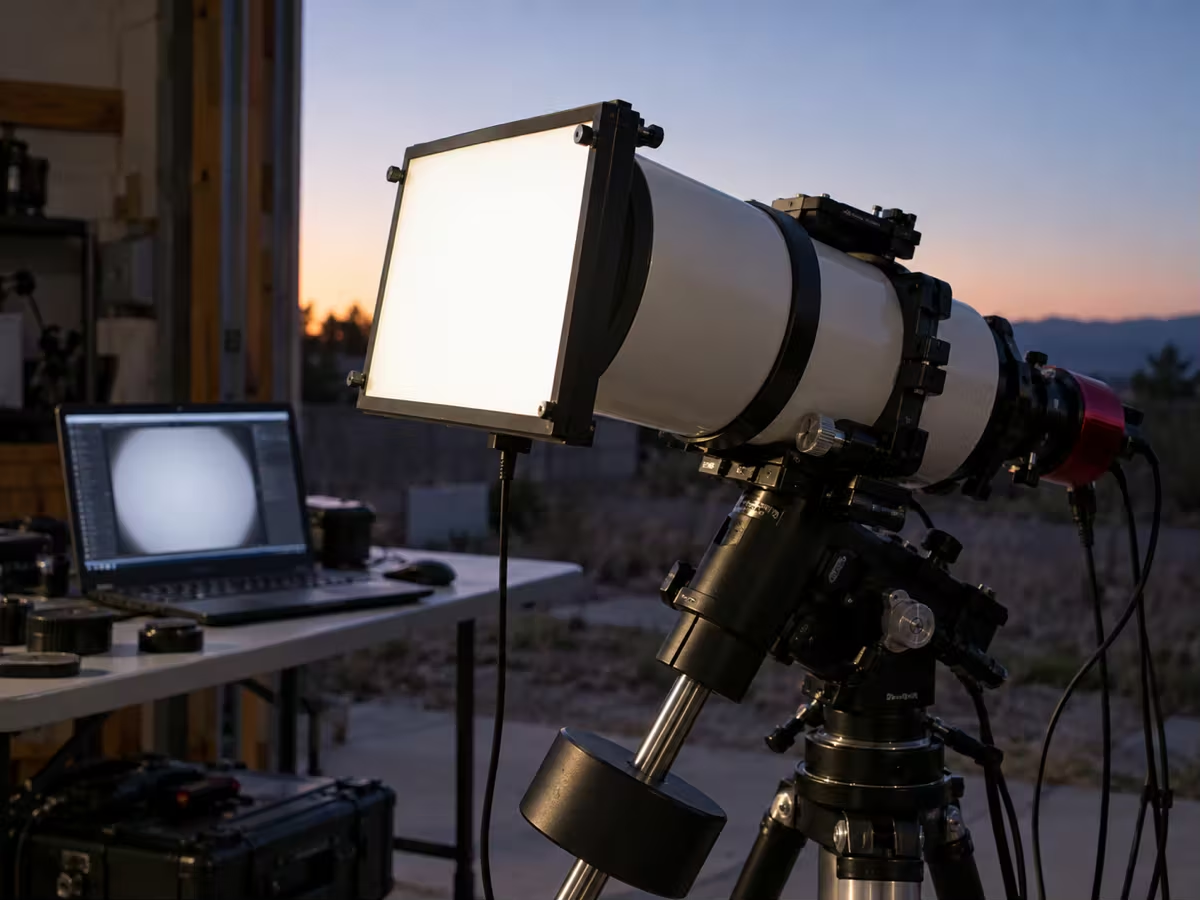
Flats are normally captured using a uniformly illuminated surface, such as a suitable flat-field panel or an evenly illuminated diffuser.
The optical configuration should remain unchanged between the lights and flats. Changes in focus, camera rotation, filters, or dust positions may make the calibration less effective.
The flat exposures must avoid saturation and remain within the camera’s linear response range.
Bias Frames: Measuring the Sensor’s Electronic Offset
A bias frame is a dark exposure taken at the shortest appropriate exposure time.
It records the camera’s electronic offset, which is introduced to prevent low measured values from being clipped during sensor readout. A master bias can also capture certain repeatable readout patterns.
Bias frames are usually acquired with the sensor covered and with acquisition settings compatible with the intended calibration workflow.
Combining many bias exposures produces a master bias with reduced random variation.
It is important to understand that bias subtraction does not eliminate random read noise from a light frame. It removes the repeatable offset and associated fixed-pattern components.
Some modern workflows use a verified synthetic bias level rather than a conventional master bias, but that value must be appropriate for the specific camera.[5]
Dark-Flat Frames: When Are They Needed?
Dark-flat frames, also called flat darks, are dark exposures that match the exposure duration and relevant settings of the flat frames.
They are used to calibrate flats by removing the offset and dark signal associated with those exposures.
They can be particularly useful when flat exposures are long enough for dark current or other exposure-dependent sensor effects to matter.
In an appropriate workflow, a matching master dark-flat can replace a master bias during flat calibration.
However, dark flats are not automatically necessary for every modern camera or every short flat exposure.
The correct choice depends on the sensor’s behavior, the exposure duration of the flats, and the calibration method being used.
Creating Master Calibration Frames
A master calibration frame is produced by combining multiple exposures of the same calibration type.
For example, a series of dark frames can be integrated into a master dark, while appropriately calibrated flat frames are combined into a master flat.
The goal is to estimate repeatable sensor or optical effects while minimizing random noise in the calibration data itself.
An important detail is that raw dark frames already contain the camera’s electronic bias offset. If a raw master dark is subtracted from a light frame, the offset is normally removed as part of that subtraction.
Subtracting the same bias again would be incorrect.
For a simplified workflow using a raw master dark and a bias-corrected normalized flat, the calibration relationship can be represented as:
Calibrated light = (Light − Master dark) ÷ Normalized master flat
The normalized master flat must first have its own bias or dark-flat component removed.
Other workflows use bias-corrected dark masters and require a different arrangement of operations. The essential rule is to account for every unwanted component correctly, without subtracting the same component twice.[5]

Calibration Frame Comparison
| Frame type | Main purpose | Capture method | Important matching requirements |
|---|---|---|---|
| Light | Records the astronomical subject | Normal night-sky exposure | Consistent target coverage and suitable camera settings |
| Dark | Measures dark signal and sensor defects | Sensor covered | Light exposure time, gain/ISO, temperature |
| Flat | Measures uneven optical illumination | Uniform light source | Same optical path and relevant camera settings |
| Bias | Measures electronic offset | Covered sensor, shortest suitable exposure | Compatible sensor readout and gain/ISO |
| Dark-flat | Measures unwanted signal in flats | Covered sensor | Flat exposure time, temperature, and relevant settings |
6. Preparing and Organizing Your Files Before Stacking
Good file organization makes astrophotography processing considerably easier. A typical imaging session can produce dozens or hundreds of light exposures, along with several groups of calibration files.
If these files are mixed together, it becomes difficult to verify which images belong to which acquisition settings. Organized folders reduce mistakes, make automated scripts more reliable, and allow you to repeat a processing workflow without reconstructing the entire session.
Creating a Clean Astrophotography Project Folder
For the Siril beginner workflow, create one main project directory containing four subfolders.
The required folder names are lights, darks, flats, and biases.
Place the original light exposures inside lights, and put each calibration type into its matching folder.
The names are important because Siril’s standard preprocessing script expects this structure.
You can create a separate project directory for each target or imaging session.
For example, a folder named orion-nebula-session-01 can contain the four required subfolders.
Keep unrelated images and processed JPEG files outside these input directories. The official Siril tutorial specifically warns against mixing different file types in the script’s source folders.[6]
Working With RAW, FITS, and TIFF Files
Different image formats serve different roles during astrophotography processing.
RAW files preserve sensor data from consumer cameras. FITS is a widely used scientific astronomy format that can store image data along with information about acquisition and processing.
TIFF is useful for transferring high-bit-depth images between processing applications and for preserving edited images without JPEG-style lossy compression.
During initial calibration, sensor-level RAW or suitable FITS data is preferable because it preserves information needed for accurate corrections.
Once the images have been calibrated and stacked, high-bit-depth TIFF files become useful for editing in other software.
The important distinction is not simply the filename extension. It is whether the data retains suitable precision and a predictable intensity relationship.
Checking Images Before Importing Them
Before starting the software, review a sample of the original exposures.
Look for obvious star trails, blurred focus, clouds, severe wind vibration, or frames where the astronomical target is no longer properly positioned.
Also check that the light frames have compatible exposure settings and adequate overlap.
A photograph that looks very noisy is not necessarily unusable. Faint astronomical exposures often appear unimpressive before stacking.
The more important questions are whether the stars are reasonably sharp, the sensor data is intact, and the image contains useful signal.
Reject clearly defective exposures, but avoid excluding every frame that does not look beautiful by itself.
Preserving Original Files and Acquisition Settings
Always preserve your original files before processing.
A working copy allows you to experiment with stacking parameters without risking the only version of your observations.
If possible, retain exposure time, ISO or gain, sensor temperature, filter information, camera model, and other acquisition metadata.
These details become especially important when processing data collected across multiple nights.
They help determine whether calibration files are compatible and whether exposures can be integrated without creating new problems.
For long-term storage, consider keeping the original light frames, useful calibration masters, and the final linear stack even if temporary converted sequences are deleted.
7. Step-by-Step Tutorial: Stack Astrophotography Images Using Siril

Siril is a free astronomical image-processing application that can perform calibration, registration, stacking, and subsequent image enhancement.
For beginners, one of its most useful features is automated preprocessing. A script can execute a series of operations without requiring the user to configure every stage manually.
The following workflow is intended for conventional deep-sky photographs captured with a one-shot-color camera, including many DSLRs, mirrorless cameras, and color astronomy cameras. It assumes you have compatible light, dark, flat, and bias frames. The interface and available scripts may vary between Siril versions.[6] [7]
Step 1: Download Siril and Create a Working Directory
Visit the official Siril website and download the release appropriate for your operating system.
Install the application using the instructions provided for Windows, macOS, or Linux.
Before importing images, create a dedicated project folder in a location with sufficient free storage.
An SSD is useful because processing can involve reading and writing numerous large intermediate files.
Name the project according to your astronomical target or observation session.
Avoid complicated folder paths if you are unfamiliar with the software. A straightforward project directory makes the first workflow easier to troubleshoot.
After launching Siril, locate the control for selecting the working directory.
Step 2: Import Light and Calibration Frames
Create the required folders inside your project directory:
lightsdarksflatsbiases
Copy your original exposures into their respective folders.
Do not place darks in the lights folder or mix individual JPEG previews with RAW input files.
In Siril, choose the project folder as the working directory. The software will use this location to find the data expected by the preprocessing script.
Confirm that your calibration frames match the acquisition settings required for their purpose.
If your dataset does not contain all four categories, do not simply create empty folders and assume the standard full-calibration script will work. Select a compatible workflow instead.
Step 3: Select the Correct Preprocessing Script
Open Siril’s Scripts menu and locate the appropriate preprocessing script.
For a conventional color camera with the required calibration frames, the standard option is commonly named OSC_Preprocessing.
OSC means one-shot color, referring to cameras that capture color information using a color filter array on the sensor.
The script is designed to perform the main preprocessing operations, including calibration, alignment, and integration.
Siril also offers preprocessing scripts for monochrome cameras and more specialized applications.
Do not choose a monochrome or narrowband script merely because it sounds more advanced. The script must match the type of data you captured.
If a standard script is missing, consult the official Siril script documentation and script-management instructions.[7]
Step 4: Calibrate the Light Frames
Once the script begins, Siril processes the calibration exposures into suitable master files.
The dark, flat, and bias information is then used according to the script’s calibration sequence.
This stage corrects predictable unwanted signals and optical response variations before the images are integrated.
For a typical color camera, the software must also handle the sensor’s color filter array correctly.
A Bayer-pattern sensor records different color samples at different pixel locations. Demosaicing, also called debayering, reconstructs full-color pixel information from this pattern.
The correct timing of demosaicing depends on the processing method. Standard preprocessing scripts manage it as part of their workflow.
At this stage, it is more important for beginners to use correctly matched calibration data than to experiment with advanced manual settings.
Step 5: Register and Align the Exposures
Registration is the process of aligning the individual exposures to a common astronomical reference.
Siril analyzes recognizable features, usually stars, and determines how each frame should be transformed so those features match.
This is necessary even with tracking equipment because small shifts can occur between exposures.
Registration may account for translation, rotation, and other geometric differences, depending on the method used.
If frames have too little overlap or lack enough detectable stars, registration can fail.
A successful alignment means the same star is mapped to approximately the same final location in each frame. This allows the stacking algorithm to combine measurements from corresponding parts of the sky.[8]
Step 6: Select Frames and Integration Settings
Once the images are calibrated and registered, the software evaluates the data for integration.
The simplest automated workflow can complete this stage without extensive user intervention.
More advanced processing allows you to inspect measurements such as star size, background noise, and frame quality.
FWHM, or full width at half maximum, is a commonly used measure of the width of a star’s brightness profile. It helps describe image sharpness, although the value must be interpreted alongside the sampling and acquisition conditions.
The software may also use normalization and outlier rejection to combine frames appropriately.
For a first attempt, follow the official script defaults and examine the result before changing statistical rejection parameters.
Step 7: Run Stacking and Examine the Result
The final integration stage combines the registered image data.
Depending on the script and settings, the software may use average integration with statistical rejection to reduce the influence of abnormal pixel values.
Processing time depends on the number of frames, their dimensions, available memory, storage performance, and the selected operations.
When preprocessing finishes, examine the output and any processing messages.
The official Siril first-steps tutorial describes a result file named in the form result_xxx.fits, where the numeric portion represents total exposure time in seconds for that script’s output convention.
Do not assume failure if the result looks almost black. This is normal for linear astronomical data.[6]
Step 8: Preview and Save the Linear Master Image
After stacking, open the resulting FITS image if it is not already displayed.
Use the AutoStretch display mode to inspect the faint astronomical structures.
This mode changes how the image appears on screen without necessarily applying a permanent nonlinear stretch to the underlying data.
Inspect stars, the target, background consistency, and image borders.
If the stack is successful, preserve an untouched or minimally processed linear master file before beginning detailed image editing.
Keeping this master allows you to try different background extraction, color calibration, and stretching approaches without repeating the entire stacking process.
It also provides a useful starting point for future processing software.
8. Understanding Image Registration and Stacking Methods
Automated scripts are useful, but learning the basic mathematics behind stacking helps explain why some settings work better than others.
Registration and integration are separate operations. Registration establishes how the frames correspond spatially, while integration combines their measurements. Different stacking algorithms handle noise and abnormal pixels differently, making some more appropriate for specific datasets.[8] [9]
What Is Image Registration?
Image registration aligns multiple photographs so that corresponding astronomical features occupy matching coordinates.
Software generally begins by identifying suitable stars or other recognizable structures.
It then compares their positions between frames and computes a geometric transformation relative to a reference image.
A good reference frame should contain sharp, identifiable stars and represent the intended field of view.
Subpixel registration allows alignment more precisely than a whole-pixel shift by using interpolation or other reconstruction methods.
However, alignment is not the same as sharpening. It cannot recover severe blur already present within a photograph.
Accurate registration is essential because combining misaligned frames produces doubled or elongated stars.
Average Stacking vs. Median Stacking
Average stacking calculates the mean value of corresponding pixels across a series of aligned images.
For suitable independent measurements, averaging provides efficient noise reduction while preserving the expected signal level.
Median stacking selects the median value instead of the arithmetic mean.
This can be helpful when individual measurements contain unusually high or low outliers, but median integration generally has a different statistical efficiency from averaging under common noise assumptions.
Neither method is universally superior.
For many deep-sky datasets, averaging with an appropriate outlier-rejection method provides a useful balance between noise performance and artifact suppression.
Median stacking remains valuable for particular situations and calibration tasks.
What Is Sigma Clipping?
Sigma clipping is a statistical method used to identify and reject measurements that differ significantly from the expected pixel value.
After registration, the software examines the values contributed by the different exposures at a particular image location.
Measurements that fall outside selected statistical limits may be excluded before the final value is calculated.
This can help suppress hot pixels, satellite trails, and other isolated anomalies.
However, rejection thresholds must be chosen carefully.
If they are too aggressive, the software may reject legitimate information. If they are too permissive, unwanted artifacts may survive.
The number and quality of available frames also influence the reliability of the rejection process.
Weighted Stacking and Frame Quality
Weighted stacking allows different exposures to contribute different amounts to the final image.
This is useful because real imaging sessions rarely produce perfectly identical frames.
One exposure may have sharper stars, while another may contain a brighter sky background or increased noise.
Siril provides weighting methods based on measures such as star statistics, background noise, and other image characteristics.
However, weighting is not a substitute for removing completely unusable exposures.
A severely trailed frame may still damage the result even if its contribution is reduced.
For beginners, the practical lesson is to prioritize consistent acquisition and then let quality-based selection improve the integration where appropriate.[9]
When Should Beginners Use Default Stacking Settings?
Default settings are generally the best starting point when using a documented workflow with compatible input files.
They provide a known processing sequence and allow you to identify problems without changing many variables simultaneously.
After obtaining a successful first stack, you can experiment with frame rejection, normalization, and integration weights.
Change one setting at a time and compare the resulting images.
A different algorithm is not automatically better because it is more complicated.
The best method depends on the actual data, including the number of exposures, noise characteristics, tracking quality, and presence of artifacts.
Comparison of Common Integration Methods
| Method | Main advantage | Main limitation | Typical application |
|---|---|---|---|
| Mean average | Efficient random-noise reduction | Sensitive to strong outliers | Clean, consistent image sequences |
| Median | Resistant to isolated extreme values | Different noise efficiency from mean | Some calibration and artifact-prone datasets |
| Sigma-clipped mean | Combines averaging with outlier rejection | Depends on sufficient data and suitable thresholds | Many deep-sky light-frame stacks |
| Weighted mean | Gives greater influence to higher-quality measurements | Requires meaningful quality estimates | Sessions with varying frame quality |
9. Dithering, Drizzle, and Other Techniques Worth Understanding
Once beginners understand ordinary stacking, several more advanced techniques become relevant.
Dithering helps separate sensor defects from astronomical features. Drizzle provides a specialized approach to image reconstruction under suitable sampling conditions. Neither technique replaces good calibration or proper alignment, but both can improve particular datasets when applied correctly.
Understanding their purpose prevents unnecessary processing complexity and helps photographers decide when additional equipment or software features are useful.
What Is Dithering in Astrophotography?
Dithering involves introducing small intentional changes in the camera’s pointing position between exposures.
The astronomical target therefore falls on slightly different sensor pixels in successive frames.
During registration, the stars are aligned, while fixed sensor defects no longer occupy the same positions relative to the astronomical subject.
This makes some remaining defects easier to reject statistically.
Dithering is especially useful when capturing long sequences with a tracking mount because it can reduce the effect of correlated fixed-pattern noise.
Automated capture and guiding software can often coordinate dithering movements, but the exact procedure depends on the mount and camera system.
Understanding Walking Noise and Fixed-Pattern Artifacts
Walking noise is a form of correlated pattern that can appear when repeated sensor defects shift systematically across registered exposures.
It may look like faint streaks, diagonal bands, or a textured background that becomes more obvious after stretching.
The pattern can arise when fixed sensor variations interact with slow tracking drift and insufficient dithering.
Ordinary averaging is particularly effective against independent random noise, but correlated patterns do not necessarily decrease in the same way.
Proper calibration and effective dithering can help prevent these artifacts.
Aggressive noise reduction after stacking may make the background look smoother, but it does not address the underlying acquisition problem.
What Is Drizzle Integration?
Drizzle is an image reconstruction technique originally developed for astronomical observations where the available images do not adequately sample the optical detail.
Instead of treating image registration only as a conventional interpolation step, drizzle maps input pixel contributions onto an output grid.
With suitable subpixel offsets across multiple exposures, it may reconstruct finer spatial information than a simpler resampling approach.
Drizzle does not create unlimited resolution. The optical system, atmospheric conditions, sensor sampling, and input data impose physical limits.
A drizzle output can also be noisier because the signal is distributed across a larger number of output pixels.
Siril’s documentation describes these tradeoffs and provides drizzle-related workflows.[10]
Should Beginners Use Drizzle?
For a first astrophotography stack, drizzle is usually unnecessary.
A conventional calibration, registration, and average integration workflow is easier to understand and requires fewer processing decisions.
Drizzle becomes worth exploring when the imaging setup is undersampled and the dataset contains suitable small offsets between exposures.
It generally benefits from a sufficient number of well-distributed observations.
Using drizzle on a poorly focused, heavily blurred, or already well-sampled image cannot recover detail beyond the limits of the recorded data.
The increased output dimensions also require more memory, storage, and processing time.
Beginners should first learn to evaluate star sharpness and sampling before adding drizzle to their workflow.
10. Processing Your Stacked Astrophotography Image
Stacking creates a cleaner source image, but it does not usually produce a finished photograph ready for publication.
Deep-sky image processing includes several additional operations to reveal faint structures, correct background variations, balance colors, and prepare the image for display.
A successful workflow should preserve real astronomical information while avoiding excessive sharpening, artificial textures, or overly aggressive color adjustments. Careful processing often makes a substantial difference to the final appearance.
Why Does a Successfully Stacked Image Look Dark?
A stacked astronomical image may initially appear almost black because it contains linear image data.
Linear data preserves an approximately proportional relationship between recorded signal and pixel value.
Most of the interesting information in deep-sky photographs occupies a relatively small part of the available brightness range.
When displayed directly, faint structures can therefore be difficult to see.
A display stretch changes the visual mapping so these structures become apparent.
Siril’s AutoStretch mode is useful for examining the image, but a permanent stretch must be applied when preparing a version for ordinary image viewers or publication.
Cropping and Removing Unwanted Frame Borders
Small movements between exposures can cause parts of the registered images to overlap imperfectly.
The stacked result may contain dark borders or uneven areas where fewer frames contributed data.
Cropping removes these regions and leaves the area with more consistent coverage.
This step is particularly important before automatic background extraction because unusual border values can interfere with the background model.
Do not crop more aggressively than necessary.
The aim is to remove unreliable edges while preserving the useful field of view and maintaining a composition that supports the astronomical subject.
Background Extraction and Light-Pollution Gradients
The sky background is not always uniform.
Nearby artificial lighting, moonlight, atmospheric conditions, and the direction of the camera can produce smooth brightness gradients across an image.
Background extraction models these variations and attempts to remove them.
Siril provides methods that estimate the background using selected image samples or other fitting techniques.
The important challenge is separating unwanted gradients from genuine extended astronomical objects.
A large, faint nebula may cover much of the image and can be incorrectly treated as background.
For this reason, background extraction must be inspected carefully. Removing too much background can erase real faint signal.[11]
Color Calibration and White Balance
Astronomical image colors can be affected by the camera’s sensor response, optical filters, atmospheric effects, and processing decisions.
Color calibration attempts to establish a more meaningful balance between the image channels.
Basic manual calibration can be useful, but modern astronomical processing tools also provide methods based on known stellar color information.
Siril includes photometric and spectrophotometric color-calibration approaches that rely on astronomical reference data.
These methods require appropriate image information and, for catalog-based calibration, a successful astrometric solution.
Color calibration is generally best performed while the image remains linear.
The objective is not to make every object intensely colorful, but to create a credible starting point for subsequent processing.[12]
Histogram Stretching and Revealing Faint Details
Histogram stretching changes the relationship between recorded intensity values and displayed brightness.
This is essential for most deep-sky images because the faint structures occupy a narrow brightness range in the original linear data.
A careful stretch can reveal galaxy arms, emission nebulae, and faint dust while maintaining a natural-looking background.
The challenge is preserving bright stars and high-intensity regions without making the background excessively noisy.
Aggressive black-point adjustment can erase faint details. Excessive stretching can produce bloated stars and unrealistic contrast.
It is usually more effective to make controlled adjustments while repeatedly examining both the bright structures and the faint background.
Noise Reduction and Sharpening
Even after stacking, some noise remains.
Noise reduction can make the image more visually coherent, especially in faint background regions. However, excessive processing can remove genuine fine structure along with unwanted noise.
Sharpening and deconvolution can improve the appearance of some details when the underlying information supports those adjustments.
They cannot reliably recover details that were never resolved during acquisition.
Aggressive sharpening may introduce dark halos, ringing, or artificial texture around stars.
A restrained workflow usually produces more trustworthy astrophotography than one that attempts to make every faint feature extremely sharp.
Exporting for Web Publishing and Archiving
After processing, preserve a high-quality master image before creating web-sized copies.
FITS is suitable for retaining astronomical processing data. High-bit-depth TIFF is useful for continued editing in compatible applications.
PNG provides lossless image storage and can be appropriate for diagrams or certain finished images.
JPEG is widely compatible with websites and social media, but uses lossy compression. Export it at a suitable quality rather than repeatedly editing and resaving the same file.
For online publication, use an appropriate color space and verify how the image appears in standard browsers.
Keeping the original linear stack, a processed master, and a web export gives you flexibility for future revisions.
11. Different Stacking Workflows for Different Types of Astrophotography
Not every astronomical subject requires the same image-stacking strategy.
Deep-sky photography, wide-field nightscapes, lunar imaging, and planetary photography often involve different acquisition methods and processing priorities.
The central idea of aligning and combining useful observations remains consistent, but exposure duration, frame selection, tracking, and software algorithms can differ substantially.
Understanding these distinctions helps beginners choose the correct workflow instead of assuming one stacking application can process every astronomical image equally well.
Deep-Sky Image Stacking for Nebulae and Galaxies
Deep-sky image stacking is designed for relatively faint astronomical subjects that require substantial total integration time.
Photographers commonly capture many exposures over minutes or hours, depending on the equipment and target.
The images are calibrated, registered using stars, and integrated to improve the signal-to-noise ratio.
Deep-sky processing often includes background correction, color calibration, and nonlinear stretching.
The primary objective is not simply to select the single sharpest moment. It is to accumulate sufficient high-quality signal while controlling unwanted noise and artifacts.
Siril, DeepSkyStacker, and other dedicated astronomical processing applications support this general approach.
Wide-Field and Milky Way Stacking Without a Star Tracker
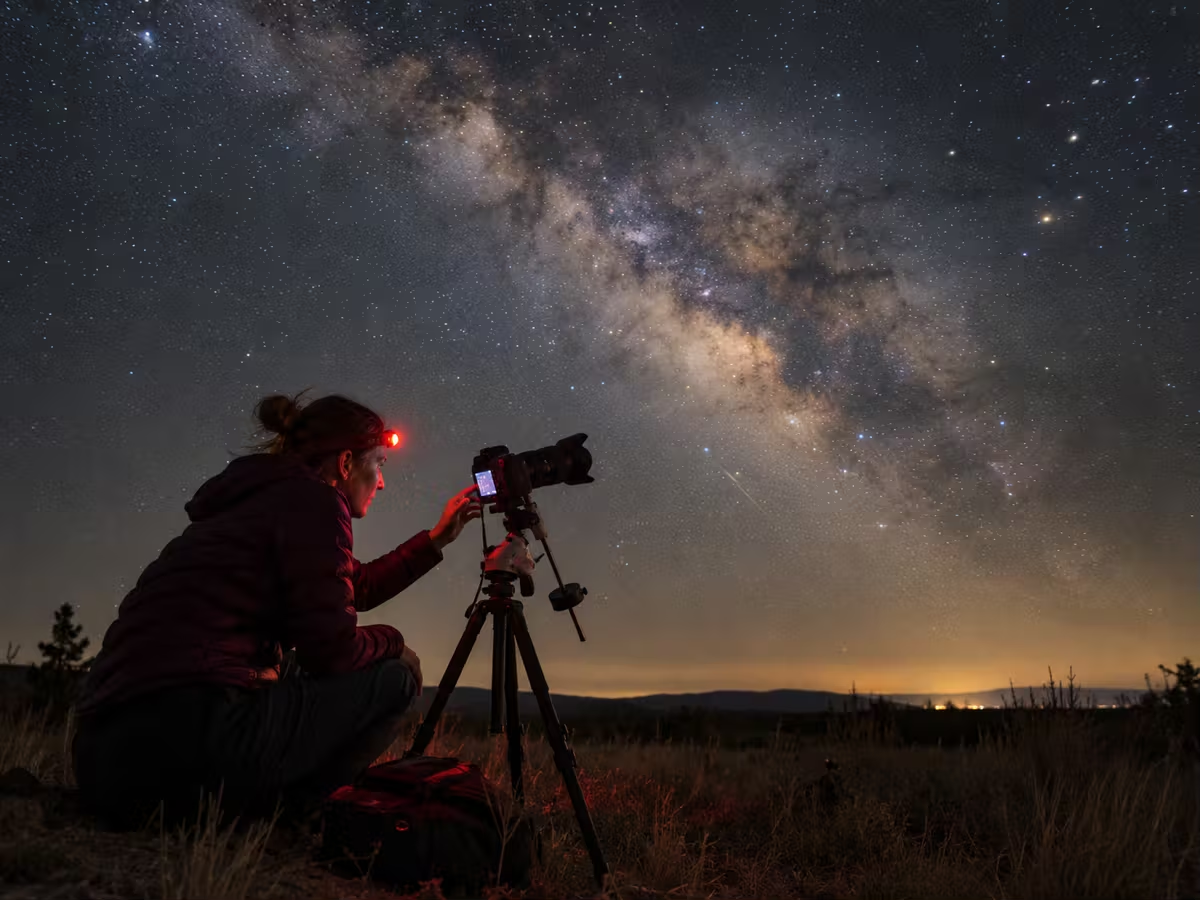
Wide-field astrophotography can be performed using a stationary tripod and a camera lens.
Because the Earth rotates, individual exposures must be short enough to limit visible star trailing.
A sequence of these short images can then be aligned on the stars and stacked.
A complication arises when the photograph includes mountains, trees, or other terrestrial foreground objects.
The stars move relative to the stationary foreground, so aligning the sky can blur the landscape.
Specialized nightscape software can address this using separate sky and foreground treatment.
Sequator, for example, provides a foreground-preservation approach called Freeze Ground for suitable imaging conditions.[13]
Lunar and Planetary Stacking Using Video Frames
Lunar and planetary astrophotography often relies on capturing short video sequences rather than long exposures.
Planets such as Jupiter and Saturn are relatively bright compared with faint deep-sky objects, but atmospheric turbulence can blur the image from moment to moment.
This leads to a technique called lucky imaging.
Software analyzes the recorded frames, ranks them according to quality, and integrates a selected portion of the observations.
AutoStakkert! is designed for this kind of planetary, lunar, and solar image alignment and stacking.
Its workflow emphasizes frame quality and local alignment to reduce the influence of atmospheric seeing. The resulting stack usually requires additional sharpening or other processing.[14]
Live Stacking With Astronomy Software and Smart Telescopes
Live stacking combines incoming exposures while an imaging session is still underway.
As the camera continues collecting data, the software aligns and integrates new frames into an evolving image.
This gives the observer an opportunity to see faint astronomical objects become more visible during acquisition.
Live stacking can be useful for electronically assisted astronomy, public demonstrations, and quickly assessing target framing.
However, the available calibration, quality control, rejection methods, and processing options depend on the software and equipment.
A live-stacked preview should not automatically be considered equivalent to a carefully calibrated and fully processed offline integration.
Combining Astrophotography Data From Multiple Nights
Many faint astronomical targets require more imaging time than one night can provide.
Multisession stacking allows data collected on different nights to contribute to the same final image.
The exposures need sufficient overlap, compatible optical configuration, and suitable calibration.
Differences in camera rotation, sky brightness, atmospheric transparency, filters, and sensor temperature can complicate integration.
Proper normalization and registration can help combine observations with some differing conditions.
Calibration masters should be matched to the relevant acquisition sessions rather than applied indiscriminately.
Organizing the data by night while retaining exposure metadata makes multisession processing more manageable.
12. Common Astrophotography Stacking Problems and How to Fix Them
Even a carefully planned imaging session can produce disappointing results. The difficulty is determining whether the problem originated during capture, calibration, registration, integration, or post-processing.
Troubleshooting becomes much easier when you examine each stage separately. Instead of immediately applying stronger sharpening or noise reduction, inspect the source frames and identify what changed between the original data and the stacked output.
Why Are My Stars Blurry After Stacking?
Blurry stars can result from poor focus, tracking errors, atmospheric seeing, or incorrect registration.
Begin by examining individual light frames at full resolution.
If the stars are already blurred in every exposure, the problem likely occurred during acquisition.
If the individual images are sharp but the stack is blurry, registration may have failed or a significant number of poor-quality frames may have been included.
Check whether the software successfully identified and matched stars.
Also examine whether processing introduced excessive smoothing or interpolation artifacts.
Sharpening the final image should not be the first corrective step.
Why Does My Stacked Image Look Too Dark?
A dark-looking stacked image is often completely normal.
Astronomical processing frequently preserves linear pixel values, which place faint structures near the dark end of a conventional display.
Use an appropriate preview stretch to determine whether the signal is present.
If the target becomes visible after stretching, the stack may be working correctly.
If the image remains genuinely weak, investigate total integration time, exposure settings, sky conditions, and optical performance.
Also check whether the data was incorrectly calibrated or stretched.
Increasing brightness alone cannot compensate for an exposure sequence that contains insufficient useful signal.
Why Are There Strange Colored Pixels or Noise Patterns?
Bright red, green, or blue pixels can originate from defective sensor locations, hot pixels, or processing problems.
Color artifacts may also appear when RAW sensor data is interpreted with an incorrect Bayer pattern or demosaicing method.
Repeated streaks or textured backgrounds may indicate correlated fixed-pattern noise.
Examine a single original light frame, then compare it with the calibrated and integrated versions.
If the artifacts are already present in the originals, investigate the sensor and acquisition conditions.
If they appear after calibration or color conversion, review the selected master files, RAW interpretation, and preprocessing workflow.
Why Does My Image Have Dark Corners or Dust Rings?
Dark corners and circular shadows are frequently associated with vignetting or dust in the optical system.
Flat-field calibration is intended to correct these effects, but the flats must accurately represent the illumination pattern present during the light exposures.
If the camera rotates, focus changes, or dust moves between the lights and flats, the correction may become inaccurate.
Improper bias or dark-flat calibration can also create uneven correction.
In some situations, incorrect flat calibration can make the corners look too bright instead of too dark.
Review the original flat frames and verify that they were acquired without saturation and with the optical setup unchanged.
Why Did the Software Reject Some of My Images?
Registration and stacking software may exclude frames that cannot be aligned or do not meet selected quality criteria.
A frame may lack sufficient detectable stars because of clouds, poor focus, excessive motion, or unusually short exposure.
A major framing change can also reduce overlap with the reference image.
Inspect rejected frames before changing the registration settings.
If they are clearly defective, rejection is appropriate.
If they appear usable, examine star-detection parameters, reference-frame selection, image orientation, and overlap.
Do not force every exposure into the final stack simply to increase the frame count.
Why Is Stacking Taking So Long or Running Out of Memory?
Astrophotography stacking is demanding because software must repeatedly process large image arrays.
High-resolution cameras and long sequences increase storage requirements and processing time.
Certain operations, including drizzle, may produce larger images than the originals.
If processing becomes unusually slow, check available disk space and whether the software is using a slow external drive.
Close unnecessary applications when working with memory-intensive datasets.
You can also experiment with smaller test sequences before attempting the full dataset.
Avoid reducing image resolution merely to hide a processing problem unless you understand the consequences for the intended final image.
Why Does My Finished Image Look Worse Than Expected?
A disappointing final image can result from several small problems rather than one obvious failure.
Poor focus, insufficient integration time, mismatched calibration frames, bright sky conditions, and aggressive stretching may all contribute.
The most reliable troubleshooting method is to compare the stages of processing.
Begin with an original light frame, then inspect the calibrated data, registered sequence, linear stack, and final stretched image.
Look for the first stage where the problem becomes visible.
If a strong artifact appears immediately after calibration, investigate the masters. If it appears after integration, review frame registration and rejection. If it only appears after stretching, examine the processing adjustments.
Quick Troubleshooting Reference
| Problem | Possible causes | First corrective action |
|---|---|---|
| Double or blurry stars | Registration failure, tracking error | Inspect original frames and alignment |
| Very dark stack | Linear display, insufficient signal | Use preview stretch and check integration |
| Colored pixel artifacts | Hot pixels, calibration, demosaicing | Check darks and RAW interpretation |
| Dark corners | Vignetting, incorrect flats | Verify flat calibration |
| Bright corners | Overcorrected flats | Check flat exposure and offset correction |
| Streaked background | Correlated fixed-pattern noise | Review calibration and dithering |
| Missing frames | Alignment failure or rejection | Inspect excluded exposures |
| Extremely slow stacking | Large data, insufficient resources | Check storage, RAM, and processing settings |
13. A Practical Beginner Image-Stacking Example
A practical example helps connect the different parts of the workflow.
Consider a hypothetical beginner photographing a bright deep-sky target with a color camera and tracking mount. The session produces forty usable light exposures, each sixty seconds long, along with suitable calibration frames.
This example is designed to illustrate the calculations and processing sequence. It is not a claim about a particular real observation or camera model.
Starting With a Small Collection of Exposures
Assume the photographer has captured forty light frames of the same target.
Every frame uses the same exposure duration and suitable camera settings.
The stars are reasonably sharp, and the target remains within the field of view throughout the session.
The photographer also collects matching dark frames and appropriate flats and bias frames.
Before stacking, the images are copied into the standard Siril project folders.
A quick inspection shows that none of the forty light frames has severe trailing or cloud obstruction.
This is a suitable dataset for learning automated preprocessing, although the final quality still depends on the brightness of the target and actual capture conditions.
Calculating Total Integration Time
Total integration time is the sum of the exposure durations of the usable light frames.
In this example:
40 frames × 60 seconds = 2,400 seconds
Dividing by sixty gives:
Total integration time = 40 minutes
The calibration frames are not added to this total because they do not record the astronomical target.
If ten of the light frames were rejected, the remaining thirty would provide only thirty minutes of integration.
This illustrates why the amount of accepted data matters more than the number of photographs originally captured.
For planning future sessions, record both the number of accepted frames and their total exposure duration.
From Individual Frames to a Calibrated Stack
The photographer first organizes the source data and selects the appropriate Siril preprocessing script.
The script combines calibration frames into masters and applies the required corrections to the light exposures.
Next, it identifies stars and registers the frames to a common reference.
The calibrated and aligned exposures are then integrated.
After stacking, the photographer opens the linear FITS result and selects a preview stretch to inspect the image.
The resulting file can be saved as the processing master before further adjustments.
At this point, the photographer has completed the core stacking workflow without needing to master every advanced image-processing feature.
Comparing the Single Frame and Final Result
To evaluate the improvement, the photographer should compare a representative single light exposure with the stacked image.
The comparison must be made carefully because a raw single exposure and a heavily stretched final image are not directly equivalent.
Using comparable display adjustments gives a more meaningful illustration of how random noise changes.
For forty equivalent, independent exposures, the idealized SNR improvement relative to one frame is approximately √40, or about 6.3 times.
This does not mean the image becomes 6.3 times sharper or that every faint feature becomes visible.
The actual improvement depends on the data and processing. It is a statistical relationship, not a guaranteed visual result.
14. Beginner Mistakes, Best Practices, and a Repeatable Workflow
Developing a consistent workflow is more valuable than memorizing complicated stacking settings.
Astrophotography combines several technical processes, and small errors can affect the entire image. A reliable routine helps identify problems early, protects the source data, and makes results more reproducible.
As experience grows, the workflow can become more sophisticated without abandoning the essential principles of good acquisition, correct calibration, careful registration, and restrained processing.
Mistakes That Reduce Stacking Quality
A common mistake is concentrating on the number of exposures while ignoring their quality.
Hundreds of badly focused frames cannot replace a smaller collection of sharp, well-acquired observations.
Another problem is using mismatched calibration frames, especially darks captured with incompatible settings or flats taken after significant optical changes.
Some beginners also apply strong sharpening or noise reduction to individual frames before stacking, which can interfere with proper calibration.
Using an inappropriate script or incorrect sensor color pattern can introduce additional errors.
Finally, excessive stretching may create an impressive-looking but inaccurate image.
The best approach is to solve acquisition and calibration problems before relying on post-processing.
A Beginner’s Pre-Capture Checklist
Before photographing an astronomical target, verify that it is visible from the observing location and that the chosen lens or telescope provides a suitable field of view.
Confirm that the camera is securely mounted and focused.
Take a test exposure to check star shape, brightness, and framing.
Use a suitable RAW or astronomical image format, and ensure adequate storage space.
If using a tracker, verify alignment and whether the chosen exposure duration produces acceptably round stars.
Plan how calibration frames will be acquired, particularly flats that require an unchanged optical configuration.
A short test at the beginning of the session can prevent significant wasted observing time.
A Post-Capture and Processing Checklist
Once the session is complete, copy the original images to a safe location before processing.
Separate the light frames from each calibration category and verify that the settings are compatible.
Inspect the lights for obvious defects.
Next, perform calibration, registration, and integration using a documented workflow.
Review the resulting linear image before beginning post-processing.
Crop invalid borders, evaluate the background, calibrate the color where appropriate, and apply a controlled stretch.
Preserve the original data and a high-quality stacked master.
When a problem occurs, return to the earliest relevant stage instead of repeatedly applying stronger editing adjustments.
When to Move Beyond Automated Stacking
Automated preprocessing is an excellent starting point because it makes the full workflow manageable.
However, some datasets require additional control.
You may need manual calibration when combining data from multiple sessions or when your camera behaves differently from the assumptions of a standard script.
Advanced registration can become useful for challenging fields, unusual distortion, or mosaics.
Custom rejection and weighting can help when exposure quality varies.
Drizzle, narrowband processing, and sophisticated background modeling become relevant as your equipment and imaging goals develop.
The appropriate time to adopt these tools is when you understand the problem they are intended to solve.
15. Frequently Asked Questions About Astrophotography Image Stacking
Beginners often encounter conflicting advice about image counts, exposure duration, calibration frames, and stacking software.
Many questions do not have one universal answer because different cameras, targets, and sky conditions require different approaches.
The following answers focus on practical principles that can be applied across common astrophotography setups while distinguishing genuine technical requirements from optional workflow choices.
How Many Photos Do I Need to Stack for Astrophotography?
There is no fixed minimum number of photographs that guarantees a good astrophotography result.
A small collection can be enough to learn registration and integration, while faint deep-sky targets may require substantially more observing time.
The crucial measurement is total useful signal collected, which depends on both exposure duration and the number of accepted frames.
For comparable exposures, SNR improves approximately with the square root of the number integrated.
However, ten long exposures and ten short exposures may contain very different amounts of astronomical information.
Can I Stack Astrophotography Images Without a Telescope?
Yes. A camera and lens can capture many astronomical subjects suitable for stacking.
Wide-angle lenses are useful for star fields and large sections of the Milky Way, while telephoto lenses can record brighter or larger deep-sky objects.
A telescope is primarily an optical instrument that changes the amount of light collected, image scale, and field of view according to its design.
It is not necessary for the mathematical process of stacking.
The most important requirements are multiple compatible exposures with enough overlapping astronomical features for successful registration.
Can I Stack Photos Taken With a DSLR or Mirrorless Camera?
Yes. DSLR and mirrorless cameras are widely used for beginner astrophotography.
Their RAW files can provide suitable input for calibration and stacking software, provided that the camera format is supported.
A camera with manual exposure control and the ability to capture repeated images is particularly useful.
You should also be able to focus accurately and avoid unwanted camera movement.
Image stacking can significantly improve the usefulness of data captured with ordinary cameras, but the final result still depends on the optics, sensor, sky conditions, and imaging technique.
Is Image Stacking Possible Without a Star Tracker?
Yes. Untracked image stacking is possible when individual exposures are short enough to limit visible star movement.
The allowable duration depends on factors such as focal length, pixel scale, target position, and the sharpness requirements of the final image.
Wide-angle lenses are generally more forgiving than long telephoto lenses.
Stacking software can align successive images even though the stars have moved between captures.
However, field rotation, changing overlap, and foreground movement may complicate the process.
A tracker becomes increasingly valuable when longer exposures or narrower fields of view are required.
Do I Really Need Dark, Flat, and Bias Frames?
Not every dataset requires the same calibration approach.
Light frames are essential because they contain the astronomical target.
Dark frames can correct repeatable dark signal and sensor defects, while flats correct uneven optical illumination.
Bias or dark-flat frames are commonly used to calibrate the flats and account for electronic offsets or exposure-dependent signals.
Some modern cameras and processing workflows can use simplified calibration methods, but these should be based on the sensor’s actual behavior.
For a beginner using a documented full-calibration script, properly matched calibration frames are a reliable starting point.
Can I Stack JPEG Images Instead of RAW Images?
Some stacking software supports JPEG input, so combining JPEG photographs may be technically possible.
However, JPEG is generally a poor choice for serious calibration because it usually contains lossy compression, nonlinear processing, and less precision than the original sensor data.
These transformations can make dark and flat correction less reliable.
RAW is preferable when using a conventional DSLR or mirrorless camera.
FITS is commonly used for dedicated astronomy cameras.
If only JPEG photographs are available, a simplified stacking approach may still demonstrate noise reduction, but the results should not be treated as equivalent to a properly calibrated RAW workflow.
Does Stacking Make Astrophotography Images Sharper?
Stacking can improve the visibility of real fine detail by reducing the influence of random noise.
However, it does not automatically increase the optical resolution of the camera or telescope.
If individual frames contain sharp stars and useful detail, a cleaner integrated image may appear better defined after appropriate processing.
If the source images are badly blurred, stacking cannot fully recover the missing information.
Specialized methods such as lucky imaging and drizzle can provide additional benefits under suitable conditions.
These techniques have their own requirements and should not be confused with ordinary noise-reduction stacking.
What Is the Difference Between Stacking and Exposure Blending?
Image stacking combines repeated observations of the same scene, generally to improve SNR or produce a more reliable integrated measurement.
Exposure blending combines images captured with intentionally different exposures or processing characteristics.
For example, an astrophotographer might combine a short exposure of the bright Orion Nebula core with longer exposures of its faint outer regions.
This is done to preserve a larger range of useful brightness information.
The two techniques can work together. Photographers may first stack separate groups of exposures and then blend their resulting images.
However, stacking and exposure blending solve different problems.
Can I Combine Astrophotography Images From Different Nights?
Yes. Combining data from several nights is a common way to increase total integration time.
The images should have adequate overlap and reasonably compatible acquisition characteristics.
Changes in camera rotation, filters, sky background, sensor temperature, or optical configuration may require more careful calibration and normalization.
Separate calibration masters may be necessary for different sessions.
The registered images can then be integrated if the data is suitable.
Multisession stacking is especially useful for targets that require several hours of observation, but good file organization becomes increasingly important as the dataset grows.
What Is the Best Free Image-Stacking Software for Beginners?
Siril is a strong starting choice for beginners who want an application capable of both stacking and later astronomical image processing.
It includes calibration, registration, integration, background correction, stretching, and other tools in one environment.
DeepSkyStacker is another established option for deep-sky stacking, with its own image-registration and integration workflow.
For planetary, lunar, and solar video stacking, AutoStakkert! is designed around a different acquisition method and may be more appropriate.
For wide-field nightscapes that include a stationary foreground, Sequator provides specialized features.
The best choice depends on the type of astrophotography you want to process rather than one application being universally superior.
16. Final Checklist: Your First Successful Astrophotography Stack
Your first successful image stack does not have to look like a professional observatory photograph.
The important achievement is understanding how multiple exposures become one calibrated and integrated image.
Start with a manageable astronomical target and a simple acquisition setup. Capture a useful collection of sharply focused light frames and any appropriate calibration frames. Preserve the originals, organize the files, and use a documented stacking workflow.
Then inspect the result before beginning advanced processing.
The basic sequence can be summarized as:
- Choose a suitable target and test your equipment.
- Capture multiple compatible light exposures.
- Acquire the calibration frames required by your workflow.
- Organize and back up the source files.
- Calibrate the light data.
- Register the exposures using matching stars.
- Integrate the aligned frames with an appropriate stacking method.
- Inspect and preserve the linear stacked image.
- Correct background and color where appropriate.
- Apply controlled stretching and export the finished photograph.
With experience, you can refine each step and begin exploring dithering, multisession integration, drizzle, and more advanced image processing.
17. Conclusion: Turning Faint Light Into a Clearer View of the Universe
Astrophotography image stacking is one of the most important techniques for revealing faint celestial objects in digital photographs.
By combining multiple properly captured exposures, photographers can improve the signal-to-noise ratio and make subtle astronomical structures easier to observe and process.
The workflow may appear complicated at first, especially when calibration frames, registration, and statistical rejection are introduced. But the fundamental process is straightforward: collect good data, correct predictable unwanted effects, align the astronomical scene, and integrate the measurements carefully.
Free software such as Siril makes this process accessible to beginners using ordinary cameras as well as more specialized astronomical equipment.
The most significant improvements usually come from better focus, appropriate exposure settings, accurate calibration, reliable tracking, and sufficient total integration time.
Your first stacked image is not simply a finished photograph. It is the beginning of understanding how astronomical imaging turns repeated measurements of faint light into a more useful view of the universe.
Sources and References
The following sources provide the technical basis for the explanations and workflows presented in this article. Official software documentation is prioritized for instructions and processing methods, while established astronomy references support the underlying imaging principles.
[1] Siril Documentation: Signal to Noise Ratio.
Siril Project. Explains astronomical signal, shot noise, and the relationship between image integration and noise reduction.
https://siril.org/tutorials/signal-to-noise/[2] Wright, Richard S. Jr. Astrophotography: Stacking Up Your Signal.
Sky & Telescope, May 22, 2018. Discusses total signal collection, exposure duration, and signal-to-noise behavior.
https://skyandtelescope.org/astronomy-resources/astrophotography-tips/astrophotography-stacking-signal/[3] Siril Project: Official Downloads.
Release information and platform-specific downloads for Siril.
https://siril.org/download/[4] Siril Documentation: Calibration.
Official documentation describing master bias, master dark, and master flat frames.
https://siril.readthedocs.io/en/stable/preprocessing/calibration.html[5] Siril Project: Manual Pre-processing.
Official tutorial explaining calibration order, bias subtraction, dark correction, and master flats.
https://siril.org/tutorials/tuto-manual/[6] Richard, Cyril. First Steps: Pre-processing With Scripts.
Siril Project. Beginner tutorial covering project folders, automated preprocessing, and the resulting stacked image.
https://siril.org/tutorials/first-steps/[7] Siril Documentation: Script Files.
Official reference for automated preprocessing scripts, including one-shot-color and monochrome workflows.
https://siril.readthedocs.io/en/stable/scripts/Script-files.html[8] Siril Documentation: Registration.
Official reference covering astronomical image alignment, reference frames, and registration algorithms.
https://siril.readthedocs.io/en/stable/preprocessing/registration.html[9] Siril Documentation: Stacking.
Official technical reference on image integration, normalization, rejection algorithms, and stacking weights.
https://siril.readthedocs.io/en/stable/preprocessing/stacking.html[10] Siril Documentation: Drizzle.
Explains drizzle reconstruction, sampling considerations, Bayer drizzle, and processing tradeoffs.
https://siril.readthedocs.io/en/stable/preprocessing/drizzle.html[11] Siril Documentation: Background Extraction.
Describes background modeling, gradient correction, and precautions for preserving astronomical structures.
https://siril.readthedocs.io/en/stable/processing/background.html[12] Siril Documentation: Color Calibration.
Technical reference on manual, photometric, and spectrophotometric color calibration.
https://siril.readthedocs.io/en/stable/processing/color_calibritation.html[13] Sequator: Official Manual.
Documents star-aligned nightscape stacking, RAW input handling, sky masking, and foreground preservation.
https://sites.google.com/view/sequator/manual[14] AutoStakkert!: Features and Guides.
Official information about planetary, lunar, and solar frame alignment, quality selection, and stacking.
https://www.autostakkert.com/wp/guides/Additional Technical References
Siril Project: Synthetic Biases.
Explains electronic offsets and alternative calibration approaches for suitable sensors.
https://siril.org/tutorials/synthetic-biases/DeepSkyStacker: Official Project User Guide.
Covers image loading, calibration frames, registration, and deep-sky stacking.
https://github.com/deepskystacker/DSS/blob/master/Help/english/userguide.htmSiril Documentation: Image Stretching.
Explains astronomical histogram adjustments and nonlinear stretching methods.
https://siril.readthedocs.io/en/stable/processing/stretching.htmlSiril Documentation: Spectrophotometric Color Calibration.
Describes catalog-based color calibration and the importance of working with linear image data.
https://siril.readthedocs.io/en/stable/processing/color-calibration/spcc.htmlResearch and technical documentation reviewed: October 28, 2026.