
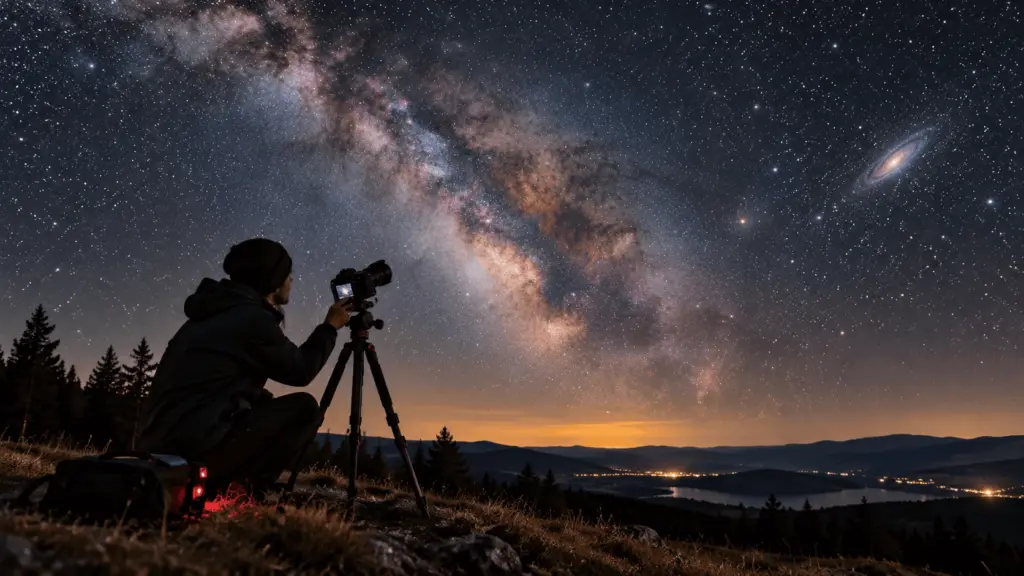
Imagine standing beneath a star-filled sky, pointing your camera toward a faint patch of light, and discovering that your photograph contains an entire galaxy millions of light-years away. What appeared almost invisible to your eyes suddenly reveals stars, glowing gas clouds, and structures hidden in the darkness.
This is the remarkable appeal of deep-sky astrophotography, a form of astronomical photography that captures celestial objects beyond our solar system.
You might assume that photographing galaxies, nebulae, and star clusters requires an expensive telescope, a professional observatory, or years of experience. Fortunately, none of those is essential for getting started.
A DSLR or mirrorless camera, a suitable lens, a sturdy tripod, and some patience can be enough to produce your first recognizable deep-sky photograph.
Modern digital cameras can collect light over multiple exposures. Specialized software then combines those images, reduces random noise, and reveals faint astronomical structures that may be difficult to distinguish in an individual photograph.
However, successful astrophotography involves more than pointing a camera upward. You need to understand the night sky, select a suitable target, manage exposure settings, capture usable image data, and process your photographs correctly.
In this comprehensive beginner’s guide, you will learn how to:
- Choose a visible, achievable deep-sky target.
- Plan around light pollution, moonlight, and weather.
- Select a camera, lens, tripod, and optional star tracker.
- Configure aperture, shutter speed, ISO, and manual focus.
- Capture multiple exposures without excessive star trailing.
- Understand calibration frames, image stacking, and integration time.
- Process your first galaxy, nebula, or star-cluster photograph.
- Troubleshoot common problems and improve future sessions.
The objective is simple: complete your first night of deep-sky imaging with usable photographs and turn those exposures into a finished astronomical image.
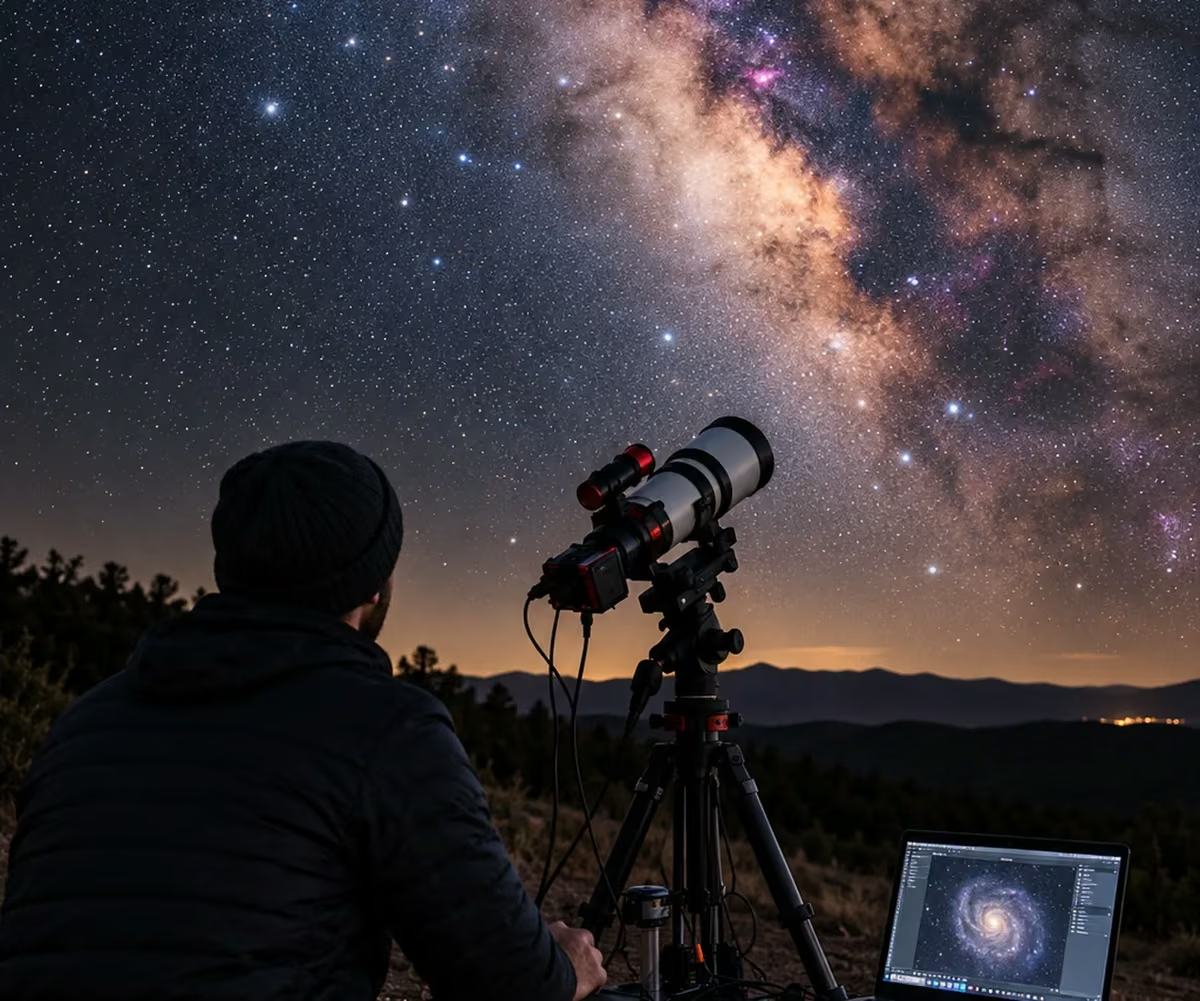
1. What Is Deep-Sky Astrophotography, and How Does It Work?
Deep-sky astrophotography is the practice of photographing astronomical objects located beyond our solar system. These objects are often extremely distant and faint, requiring techniques that differ from everyday photography. Rather than relying on a single photograph, astrophotographers frequently capture many exposures and combine them digitally. Understanding the relationship between light collection, sensor performance, and image processing is the foundation of this fascinating photographic discipline.
Understanding Deep-Sky Astrophotography
Deep-sky astrophotography records light emitted or reflected by distant celestial objects, including nebulae, galaxies, and star clusters.
Unlike ordinary nighttime photography, which may involve streetlights or illuminated landscapes, deep-sky imaging often attempts to detect astronomical structures whose light is barely distinguishable from the night-sky background.
A camera sensor records incoming photons during an exposure. The amount of astronomical signal collected depends on factors including aperture, exposure duration, optical transmission, and target brightness.
Longer exposures can collect more photons, but several limitations must be considered. Earth’s rotation causes stars to move across the camera’s field of view, the sky itself contributes unwanted background light, and image sensors introduce noise.
Instead of making one extremely long exposure, photographers typically capture multiple shorter images and align and combine them through image stacking.
This process improves the visibility of faint features by increasing the signal-to-noise ratio. The results can reveal the outer regions of galaxies, nebular structures, and stars too faint to stand out in an individual exposure. [10]
What Counts as a Deep-Sky Object (DSO)?
A deep-sky object (DSO) is an astronomical object beyond the solar system, typically observed as something other than an individual star.
Three major categories are particularly relevant to beginner astrophotography:
Galaxies are enormous gravitationally bound systems containing stars, gas, dust, and dark matter. The Andromeda Galaxy, designated M31, is a familiar example.
Nebulae are clouds of interstellar gas and dust. Some glow because of radiation from nearby stars, while others reflect starlight or appear as dark silhouettes against brighter backgrounds.
Star clusters contain groups of stars associated through their formation and, in many cases, gravitational attraction. Open clusters, such as the Pleiades, are excellent introductory targets.
Astronomers identify many deep-sky objects using established catalogs. The Messier Catalogue contains 110 entries, while the New General Catalogue, or NGC, provides a much larger collection of astronomical objects. [1]
Not all DSOs are equally easy to photograph. Apparent magnitude measures overall brightness, while surface brightness describes how that light is distributed across an object’s apparent area.
A large galaxy can have a relatively bright integrated magnitude but faint outer regions that are difficult to record.
The Moon and planets, although popular astrophotography subjects, are solar-system objects rather than deep-sky targets.
What Should Your First-Night Imaging Workflow Look Like?
A successful first-night imaging workflow begins before you leave home and continues after your camera has been packed away.
The complete process consists of planning, preparing equipment, setting up, locating the target, focusing, capturing exposures, calibrating the data when appropriate, stacking photographs, and performing final image adjustments.
For beginners, concentrating on one accessible object is usually more productive than switching between several difficult targets.
Your individual photographs may look surprisingly unimpressive. A galaxy may appear as a faint fuzzy patch, and a nebula may show only its brightest central region.
That is normal. The initial exposure is the raw material for the final photograph, not necessarily the finished result.
Your minimum first-night success criteria should be:
- The selected target is recognizable within the field of view.
- Stars are reasonably sharp and do not show excessive trailing.
- You collect multiple exposures suitable for stacking.
- The resulting image can be processed without major data loss.
A technically successful first session is more valuable than an ambitious session that produces unusable files.
2. How to Plan Your First Deep-Sky Astrophotography Session
Planning is one of the most important differences between casual nighttime photography and successful deep-sky imaging. The Earth’s rotation, the Moon’s position, seasonal target visibility, weather, and artificial lighting all determine what your camera can realistically capture. A little preparation can prevent hours of frustration and greatly improve your chances of returning with useful astronomical data.
Finding Dark Skies and Understanding Light Pollution
Light pollution is artificial illumination that brightens the night sky and reduces the contrast between astronomical objects and their surroundings.
Streetlights, buildings, industrial facilities, advertising displays, and other sources of upward or scattered light contribute to skyglow.
This additional sky brightness can make faint galaxies and nebulae especially difficult to photograph. Bright stars remain visible under poorer conditions because their light is concentrated into relatively small points, whereas extended objects distribute their light across larger areas.
Astronomers frequently describe observing conditions using the Bortle Scale, introduced by John E. Bortle. It classifies skies from Class 1, exceptionally dark, to Class 9, very bright inner-city skies. [5]
| Bortle class | General sky conditions | Beginner photography considerations |
|---|---|---|
| 1–2 | Exceptionally dark to very dark | Excellent for faint galaxies, nebulae, and surrounding dust |
| 3–4 | Rural to rural-suburban | Very favorable for many beginner deep-sky targets |
| 5–6 | Suburban to bright suburban | Bright targets remain practical; faint details require more effort |
| 7–8 | Urban to city sky | Bright clusters and galaxy cores are more achievable |
| 9 | Very bright inner-city sky | Strong limitations for faint, broadband deep-sky objects |
These classifications describe broad visual observing conditions rather than guaranteeing an exact photographic result. Atmospheric transparency, weather, local lighting, and moonlight also affect the sky.
For your first session, prioritize a reasonably dark location with safe access, stable ground, and an unobstructed view.
A dark rural site is valuable, but traveling to an isolated location is not mandatory. You can learn focusing, framing, and stacking from a suburban location before attempting more demanding targets.
Choosing the Best Moon Phase for Astrophotography
Moonlight is reflected sunlight, and it can significantly increase the brightness of the night sky.
The Moon’s approximately 29.5-day phase cycle changes how much of its illuminated hemisphere is visible from Earth. Its rising and setting times also change throughout the cycle. [6]
Near the new Moon, the Moon generally rises and sets close to the Sun, leaving much of the night comparatively free of moonlight. This makes the surrounding period especially attractive for recording faint galaxies, reflection nebulae, and other low-contrast structures.
During quarter-Moon conditions, successful imaging remains possible, particularly when the target is far from the Moon or when the Moon is below the horizon.
A full Moon generally creates difficult conditions for faint broadband targets because it illuminates the sky for much of the night.
However, the phase alone does not determine your observing conditions.
Always check the Moon’s altitude, azimuth, rise and set times, and angular separation from your target.
A night with a partial Moon below the horizon during your imaging session can be more productive than an apparently favorable phase with poor atmospheric conditions.
Checking Sky Transparency and Cloud Cover
A cloudless forecast does not necessarily mean the sky will be suitable for astrophotography.
Sky transparency describes how effectively light passes through the atmosphere. Haze, smoke, aerosols, water vapor, and thin clouds can reduce the amount of astronomical light reaching your camera.
Atmospheric seeing, by contrast, describes image distortion caused by turbulent air. Poor seeing makes stars appear to shimmer or blur and is especially important for high-resolution imaging.
For wide-field beginner astrophotography, cloud cover and transparency often have a greater immediate effect than small variations in seeing.
Useful forecast resources include:
- Clear Outside, for astronomical weather planning.
- Astrospheric, for astronomy-oriented forecasts where supported.
- Local meteorological forecasts and satellite cloud imagery.
Astrospheric provides astronomical weather information including cloud cover and transparency-related conditions. [8]
Check forecasts shortly before leaving, not only several days in advance. Pay particular attention to high clouds, haze, wind, and the possibility of rain.
If a distant location appears cloudy or unsafe, postponing the session is preferable to risking expensive camera equipment for uncertain results.
Using Planetarium Software to Plan the Night
Planetarium software simulates the sky from a selected geographic location at a specified date and time.
Programs such as Stellarium and SkySafari are useful for identifying visible astronomical targets, studying their movement, and determining when they are best positioned for photography.
Stellarium allows users to configure observing locations and dates, display celestial objects, and examine how the night sky changes over time. [7]
For a beginner, the planning process is straightforward:
- Set the correct observing location and time zone.
- Select the intended observing date.
- Search for a target such as M42, M31, or M45.
- Advance the simulated time through the night.
- Identify when the target rises, reaches its highest point, and sets.
- Check its altitude and compass direction during the intended imaging period.
An object’s highest passage across the local meridian is called culmination.
Targets photographed higher above the horizon generally suffer less atmospheric extinction, scattering, and distortion because their light passes through less atmosphere.
For an introductory session, selecting an object comfortably above the horizon is usually more productive than attempting to photograph one through a thick layer of low-altitude haze.
Understanding Celestial Coordinates and Star-Hopping
Astronomers use celestial coordinates to identify positions on the sky, much as geographical coordinates identify locations on Earth.
The equatorial coordinate system has two main components:
Right ascension (RA) is analogous to longitude and is usually expressed in hours, minutes, and seconds.
Declination (Dec) is analogous to latitude and is measured in degrees north or south of the celestial equator.
These coordinates help planetarium software and computerized mounts locate celestial objects precisely.
Beginners using ordinary tripods can instead rely on star-hopping, a method of navigating from recognizable bright stars to fainter targets.
For example, Orion’s three prominent Belt stars provide an easily recognized reference. The Orion Nebula is located in the Sword region below the Belt.
The constellation Cassiopeia can help northern observers navigate toward the Andromeda region.
Learning these relationships makes manual framing easier, particularly when your target is too faint to appear clearly in the camera’s live-view display.
3. Choosing Your First Deep-Sky Photography Target
Choosing the right astronomical target can make the difference between a successful first photograph and an evening of unsuccessful searching. Brightness, angular size, observing latitude, season, equipment, and sky darkness all influence photographic difficulty. For beginners, bright nebulae, nearby galaxies, and prominent open clusters provide an excellent introduction to deep-sky imaging.
Beginner Target Selection: What Makes a Deep-Sky Object Easy to Photograph?
An ideal beginner target should be reasonably bright, easy to locate, appropriately sized for your lens, and visible for a substantial portion of the night.
Four important characteristics determine suitability.
First, apparent brightness influences how readily the object can be detected.
Second, surface brightness affects whether its extended details stand out against the sky background.
Third, angular size determines how large the object appears in your photograph.
Fourth, altitude and seasonal visibility determine whether you can photograph it under favorable conditions.
A large target is not necessarily easy, particularly if its light is spread across a faint outer halo.
Likewise, a compact bright object may be detectable with a short focal length but too small to display much structure.
Before selecting a target, compare its apparent dimensions with your camera’s field of view in planetarium software.
For a first attempt, a bright open cluster or the luminous central region of a familiar nebula is often preferable to a small, low-surface-brightness galaxy.
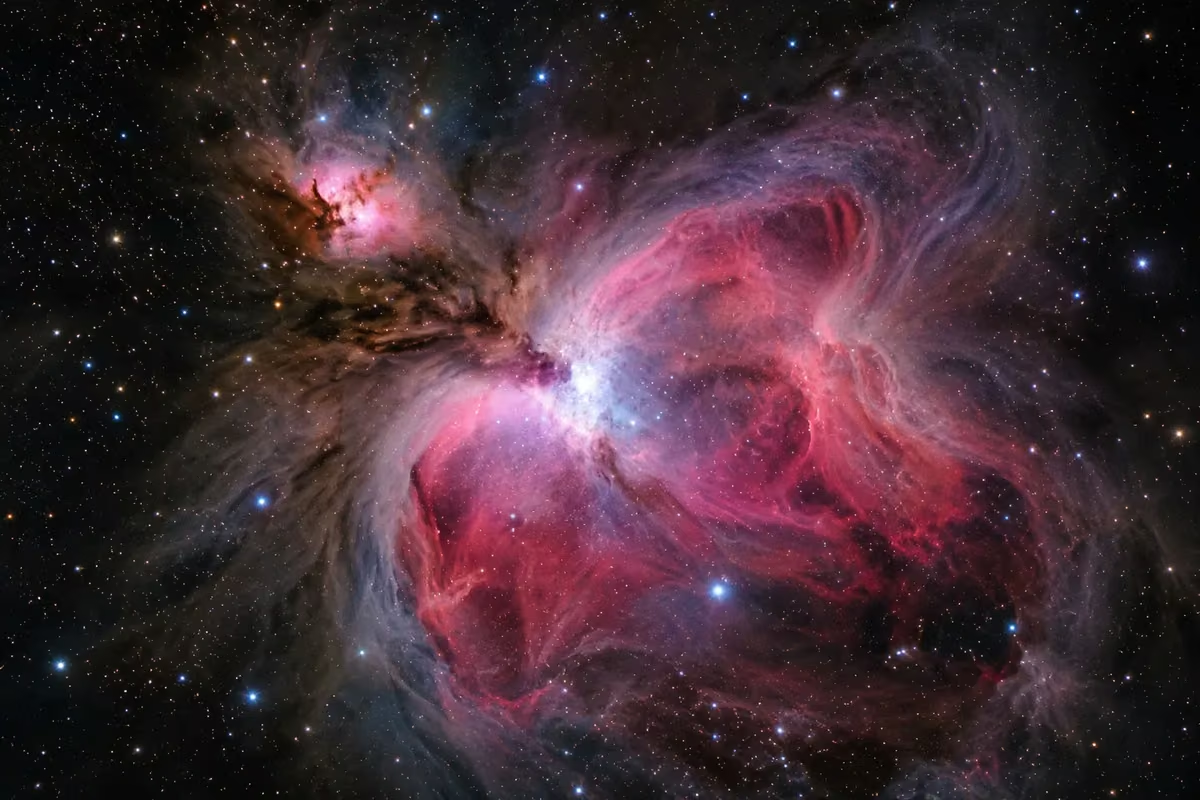
Orion Nebula (M42): A Beginner-Friendly Nebula
The Orion Nebula, cataloged as Messier 42 or M42, is one of the most recognizable emission nebulae in the night sky.
Located in the constellation Orion, it is a nearby region of active star formation approximately 1,500 light-years from Earth, according to NASA’s Messier guide. [2]
Its relatively bright central region makes it an excellent first target for DSLR and mirrorless astrophotography.
M42 can be found in Orion’s Sword, beneath the three stars of Orion’s Belt.
Using a suitable lens and modest exposures, beginners can often record the nebula’s luminous central region without a telescope.
However, the Orion Nebula presents an important processing challenge: its brightness varies enormously.
The bright inner region, which contains the Trapezium star cluster, can become overexposed while the surrounding nebulosity remains faint.
Advanced photographers sometimes combine short and longer exposures to preserve both areas.
For your first attempt, prioritize a properly focused and recognizable image rather than capturing every outer structure.
Orion is particularly well placed during Northern Hemisphere winter and is also prominently visible during suitable summer-night hours in much of the Southern Hemisphere.
Andromeda Galaxy (M31): Photographing a Galaxy
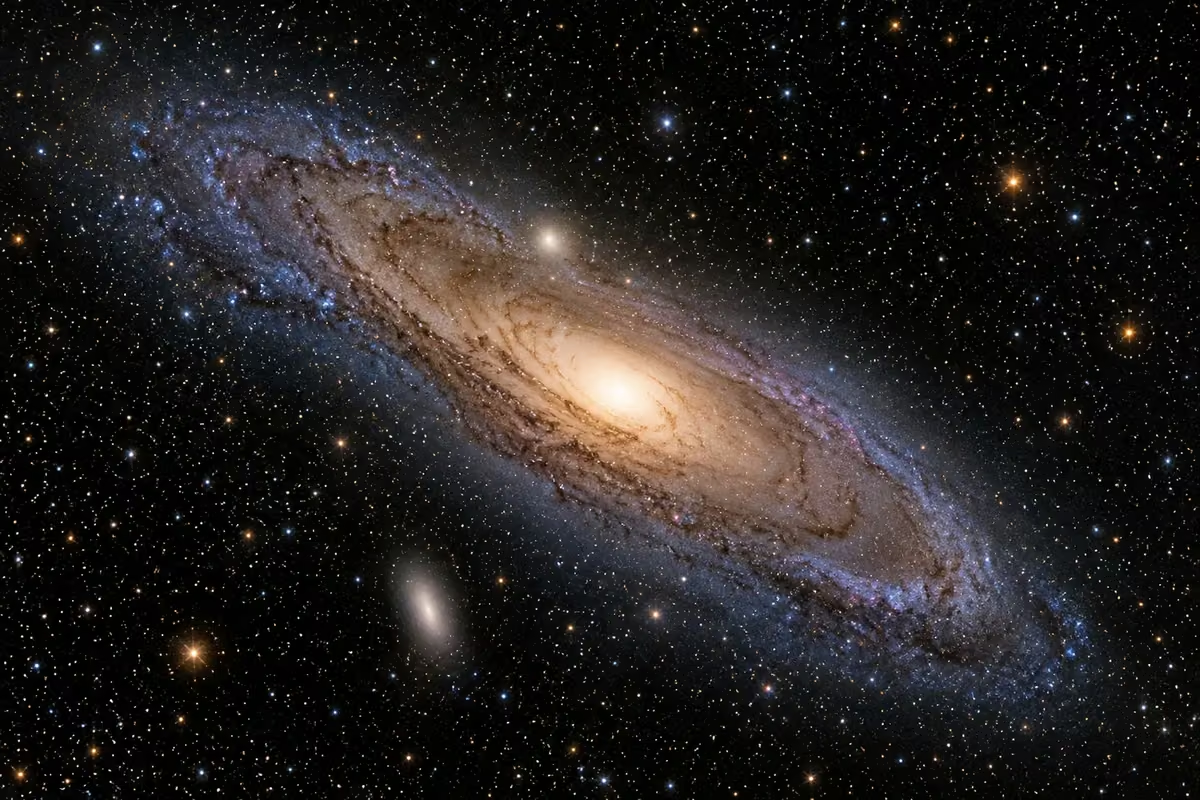
The Andromeda Galaxy, or Messier 31, is the nearest major galaxy to the Milky Way.
Located approximately 2.5 million light-years away, it is a large spiral galaxy visible from favorable dark-sky locations.
NASA describes M31 as having an apparent extent approximately six times the diameter of the full Moon. [3]
This large angular size makes Andromeda especially attractive for wide-field astrophotography.
However, the galaxy’s bright central bulge is much easier to photograph than its faint outer disk and dust lanes.
A short focal-length lens may record the galaxy as a small elongated glow. A 50mm or 135mm lens, depending on sensor size, can provide a more prominent composition.
Capturing the galaxy’s extended structure requires additional integration time and careful processing.
Andromeda is especially favorable during Northern Hemisphere autumn, although its visibility depends on latitude and local observing time.
Because M31 lies far north of the celestial equator, it is difficult or impossible to observe from some southern latitudes.
Its accessible bright core makes it a suitable beginner galaxy, but revealing its complete spiral structure is a more demanding project.
Pleiades Star Cluster (M45): Capturing Bright Stars and Reflection Nebulosity
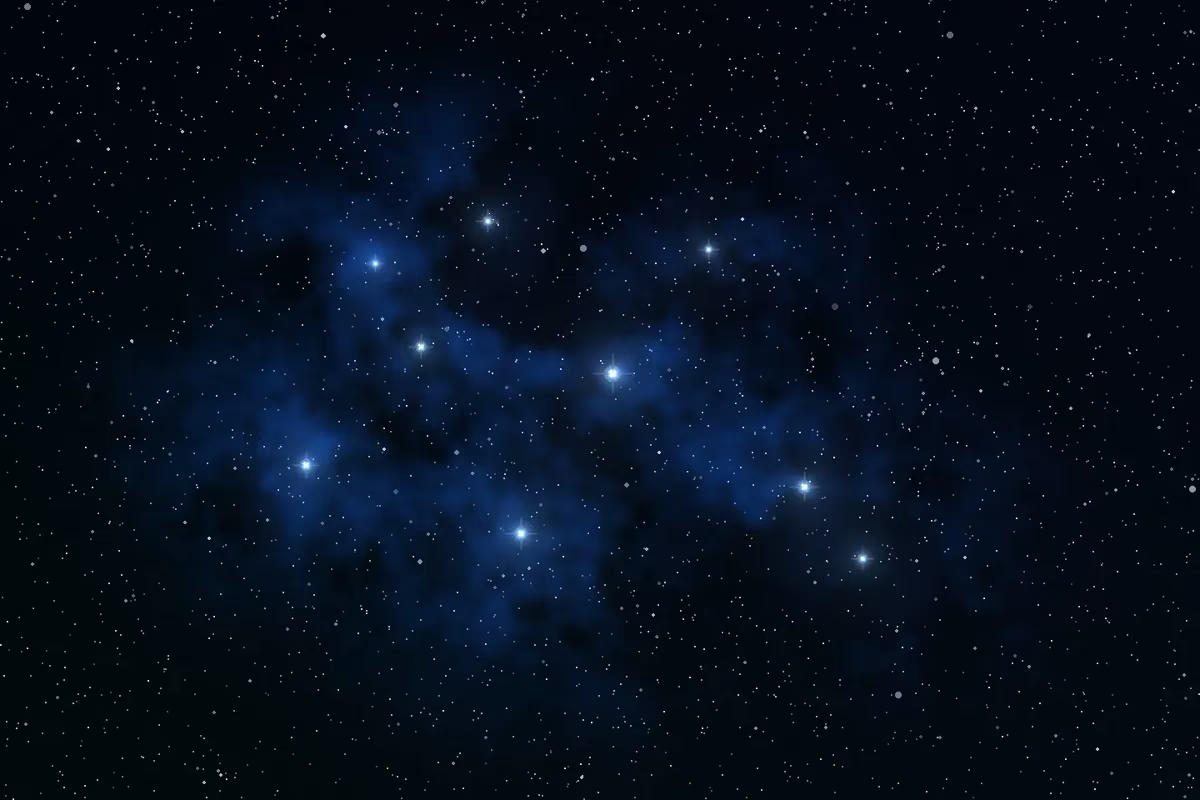
The Pleiades, also known as Messier 45 or the Seven Sisters, is a bright open star cluster in Taurus.
NASA places the cluster approximately 445 light-years away and identifies it as an easily recognizable naked-eye object. [4]
Its brightest blue-white stars form a distinctive pattern, allowing beginners to locate and photograph it relatively easily.
Unlike the glowing gas of an emission nebula, the faint blue nebulosity associated with the Pleiades is primarily reflection nebulosity.
Interstellar dust scatters and reflects light from nearby stars, producing delicate structures that can be difficult to capture.
A beginner can successfully photograph the prominent stars without revealing much surrounding dust.
Recording the reflection nebulosity usually requires darker skies, longer total integration time, careful background correction, and restrained processing.
Wide-field lenses can produce attractive compositions of the cluster against neighboring stars, while longer focal lengths offer a closer view of its central members.
The Pleiades is particularly favorable during Northern Hemisphere autumn and winter and can also be observed from many Southern Hemisphere locations.
Comparing the Best Beginner Targets
M42, M31, and M45 represent three different categories of deep-sky targets, each offering a valuable introductory challenge. The Orion Nebula is advantageous because of its bright central emission. Andromeda demonstrates how galaxies contain both luminous and faint structures. The Pleiades provides a relatively accessible star cluster, while teaching the importance of dark skies for recording surrounding dust.
| Target | Object type | Main advantage | Main difficulty | Suggested lens range |
|---|---|---|---|---|
| Orion Nebula (M42) | Emission nebula | Bright, recognizable central region | Preserving bright-core detail | 50–135mm |
| Andromeda Galaxy (M31) | Spiral galaxy | Large apparent size and bright core | Revealing the faint outer disk | 50–135mm |
| Pleiades (M45) | Open star cluster | Prominent bright stars | Capturing faint reflection nebulosity | 35–135mm |
The focal lengths above are illustrative framing choices, not minimum requirements. Sensor dimensions, tracking capability, and desired composition can substantially change the preferred lens.
Seasonal Beginner Target Selection
| Target | Favorable Northern Hemisphere evening season | Southern Hemisphere considerations |
|---|---|---|
| M42 | Approximately December–March | Often favorable during local summer evenings |
| M31 | Approximately September–December | Northern position limits visibility at southern latitudes |
| M45 | Approximately October–February | Visible from many southern locations, depending on latitude |
These ranges are approximate. Always verify actual visibility with a planetarium application for your observing location and date. [2][3][4][7]
4. What Equipment Do You Need for Your First Deep-Sky Photos?
One of the most encouraging aspects of beginner deep-sky astrophotography is that advanced astronomical equipment is optional. A conventional interchangeable-lens camera and stable tripod can capture meaningful results, especially when photographing bright or wide-field targets. The important considerations are optical suitability, reliable mounting, manual camera control, and the ability to record multiple consistent exposures.
Choosing a DSLR or Mirrorless Camera
A DSLR or mirrorless camera is a practical choice for learning deep-sky astrophotography because most models provide manual exposure controls and RAW image capture.
Popular camera families include Canon EOS, Nikon Z, and Sony Alpha, although the brand itself is less important than the features available.
A useful beginner camera should provide manual focus, adjustable shutter speed and aperture, ISO control, and a stable method for triggering repeated exposures.
Sensor size also influences photographic composition.
A full-frame sensor generally captures a wider field of view than an APS-C sensor when both use the same focal length.
However, full-frame cameras are not automatically superior in every astrophotography situation. Pixel size, sensor read noise, quantum efficiency, thermal behavior, dynamic range, and optical performance also affect results.
You do not need to purchase a specialized astronomy camera before learning these fundamentals.
If you already own a DSLR or mirrorless camera capable of saving RAW files, start with it.
Why a Stable Tripod Is Essential
A stable tripod prevents unwanted camera movement during exposure.
Because astrophotography frequently uses shutter speeds measured in seconds, even slight vibration can turn otherwise sharp stars into blurred or elongated shapes.
Choose a tripod capable of supporting the combined weight of the camera and lens without excessive flexing.
Extend its thicker leg sections first, keep the center column low when possible, and make sure all mounting connections are secure.
Wind can introduce vibration, particularly when using a large lens.
A built-in two-second shutter timer, remote shutter release, or intervalometer can reduce movement caused by pressing the shutter button.
A standard tripod does not compensate for Earth’s rotation. It simply holds the camera stationary.
A motorized tracking mount serves a different function by rotating the camera to follow the apparent motion of the stars.
For a first untracked imaging session, a well-secured photographic tripod is entirely adequate.
Selecting a Wide-Field Lens
A wide-field lens captures a relatively large area of sky and makes locating astronomical targets easier.
Beginner lens choices can be divided into three broad groups.
Wide-angle lenses, approximately 14–24mm on full-frame cameras, are useful for capturing extensive star fields and larger sky compositions.
Standard lenses, approximately 35–50mm, provide a closer view while retaining a relatively generous field of view.
Short telephoto lenses, such as 85mm or 135mm, can make deep-sky objects appear larger in the frame but require more careful exposure control and often benefit from tracking.
Lens aperture is also important.
A relatively fast lens, such as f/1.8, f/2, or f/2.8, can collect light efficiently, although wide-open optical aberrations may compromise star quality.
Examples include the Rokinon or Samyang 14mm f/2.8 family and compatible versions of the Samyang 135mm f/2.
These are examples of different optical approaches rather than mandatory purchases.
The best beginner lens is usually the sharpest suitable lens you already own.
Understanding Focal Length and Field of View (FOV)
Focal length influences image scale and determines, together with sensor dimensions, how much sky appears in a photograph.
The field of view (FOV) describes the angular region captured by the camera.
Shorter focal lengths produce wider fields. Longer focal lengths produce narrower fields and make individual astronomical objects appear larger.
Consider these approximate horizontal fields of view for a full-frame sensor measuring 36mm across.
| Focal length | Approximate horizontal FOV | Typical use |
|---|---|---|
| 14mm | 104° | Very wide star fields |
| 24mm | 74° | Large sky compositions |
| 50mm | 40° | Broad deep-sky regions |
| 135mm | 15° | Closer views of large DSOs |
These values use an idealized rectilinear-lens calculation. Actual framing depends on sensor dimensions, lens characteristics, and any subsequent cropping.
For APS-C cameras, the same physical focal length generally produces a narrower field.
Increasing focal length also makes apparent star movement more noticeable. Consequently, an untracked 135mm lens may require much shorter exposures than a 14mm lens.
Do Beginners Need a Star Tracker?
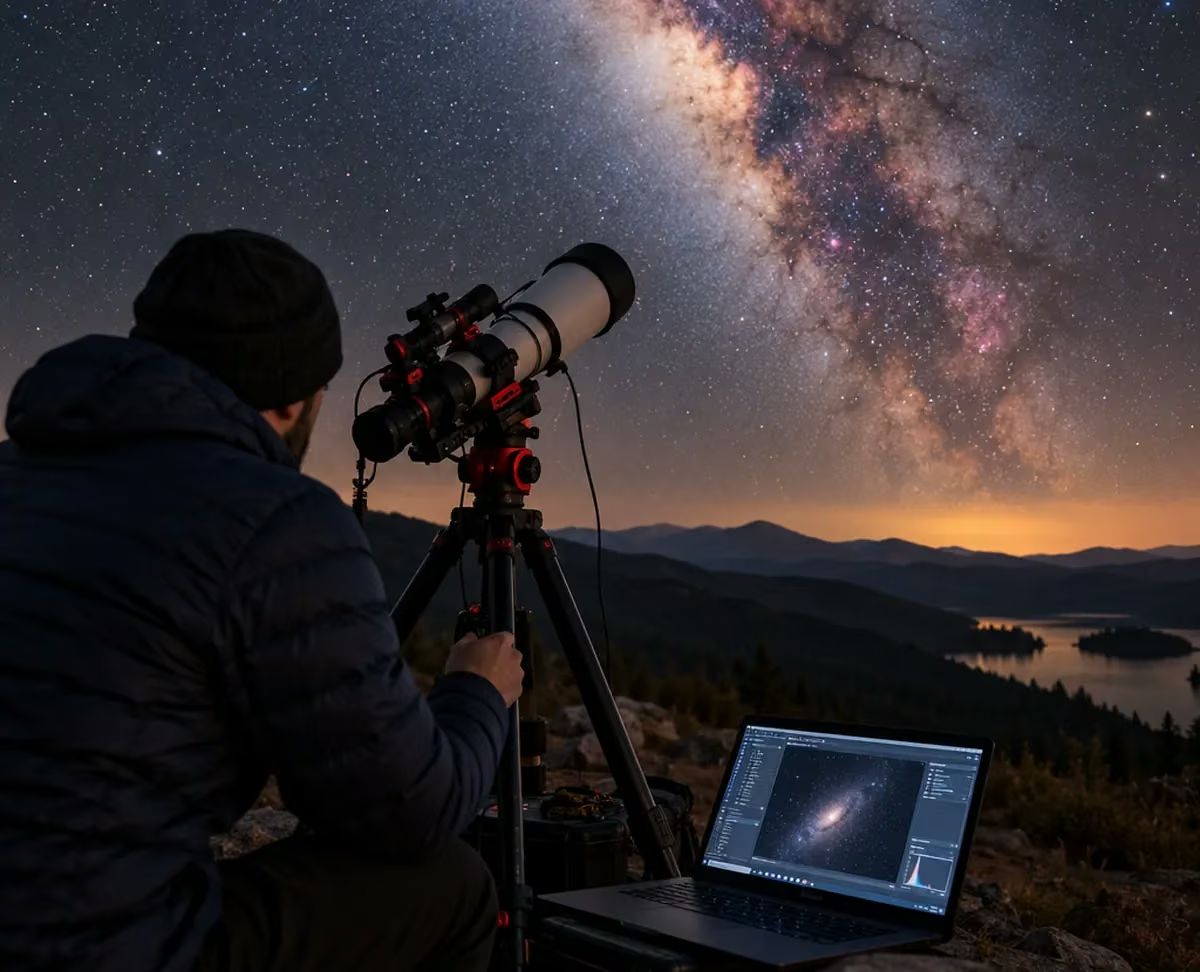
A star tracker is a motorized device designed to compensate for Earth’s rotation by moving the camera at approximately the same angular rate as the stars’ apparent motion.
This allows longer individual exposures before star trailing becomes noticeable, provided the tracker is sufficiently accurate and correctly aligned.
Popular examples include the Sky-Watcher Star Adventurer series and the iOptron SkyGuider Pro.
The iOptron SkyGuider Pro, for example, is an equatorial tracking mount designed to rotate around an axis aligned with the celestial pole. [11]
A tracker can be particularly valuable when using longer focal lengths or photographing faint targets.
However, it introduces additional requirements, including polar alignment, mounting balance, and power management.
For beginners working with a wide-angle or standard lens, an untracked tripod provides a simpler way to understand framing, focusing, exposure limits, and stacking.
Consider buying a star tracker after you have identified the limitations of your existing setup rather than assuming it is essential from the beginning.
How Polar Alignment Works
Polar alignment is the process of aligning an equatorial tracking mount’s rotational axis with Earth’s celestial rotation axis.
The celestial poles are the points around which stars appear to rotate in the sky.
In the Northern Hemisphere, Polaris provides a useful nearby reference for the north celestial pole. In the Southern Hemisphere, alignment usually requires different star references or dedicated alignment tools.
A simplified beginner procedure is:
- Secure the tracker on a stable tripod.
- Set the mount’s approximate latitude to match the observing site.
- Point its polar axis toward the appropriate celestial pole.
- Use the mount’s polar scope or supported alignment application.
- Make the required altitude and azimuth adjustments.
- Lock the adjustments and verify alignment before imaging.
Polaris does not lie exactly at the celestial pole, so accurate polar alignment requires accounting for its offset.
The exact procedure depends on the mount and should follow its official instructions. [11]
A fixed, untracked tripod does not require polar alignment because it does not attempt to compensate mechanically for Earth’s rotation.
Essential Nighttime Accessories and Equipment Protection
Accessories that seem unimportant during daylight can become essential during an astronomical imaging session. Condensation can affect optics, batteries may run down, and unfamiliar environments create safety risks after dark. A small amount of preparation reduces interrupted exposures and protects both the photographer and the equipment. The following items are particularly useful when building a reliable first-night kit.
Dew Prevention
Dew forms when an exposed surface cools sufficiently for water vapor in the surrounding air to condense upon it.
Camera lenses can become covered with moisture during prolonged nighttime sessions, especially in humid environments.
Condensation scatters incoming light and reduces contrast, potentially ruining photographs even when the camera settings remain correct.
A lens hood can provide some protection from radiative cooling and environmental exposure.
For persistent dew problems, a purpose-built lens dew heater is often more effective.
Inspect the front optical element periodically using a dim light, and avoid touching or wiping delicate glass unnecessarily.
If significant moisture develops, protect the equipment and allow it to dry safely before storage.
Battery Management
Astrophotography sessions can consume substantial battery power because cameras may remain active for long periods while recording repeated exposures.
Electronic displays, sensor operation, wireless functions, and interval shooting all contribute to power consumption.
Cold temperatures can also reduce the available performance of some battery chemistries.
Begin each session with fully charged batteries and carry compatible spares.
For longer sessions, an appropriately rated external power solution can reduce interruptions, provided it is approved or supported for the camera.
Memory cards should have enough free capacity for hundreds of RAW exposures.
Before leaving home, format cards in the camera after safely backing up existing files.
Always confirm that the camera is saving photographs correctly before beginning an unattended imaging sequence.
Red-Light Headlamp
A dim red-light headlamp can make nighttime equipment adjustments easier while limiting disruption to dark adaptation.
Human vision becomes more sensitive in low illumination after spending time in darkness, and exposure to bright white light can temporarily interfere with this adjustment.
Red illumination is commonly used at observing sites because it can be less disruptive when kept sufficiently dim.
However, excessive red light is still distracting and can affect night vision.
Use the lowest practical brightness, direct the beam toward equipment rather than other people, and avoid shining lights into telescopes or camera lenses.
A headlamp with independently accessible red mode is especially useful because it reduces the chance of accidentally activating a bright white light.
Nighttime Field Safety
Personal safety should take priority over obtaining an astronomical photograph.
Choose an observing location with legal access, stable ground, reliable communication, and a reasonably safe route back.
Before traveling to a remote location, tell someone where you are going and when you expect to return.
Wear clothing appropriate for nighttime temperatures and carry water, identification, and a charged phone.
Be aware of uneven ground, roadside traffic, wildlife, and tripod legs that can become tripping hazards.
Avoid locations where equipment could fall from a ledge or obstruct a public pathway.
Monitor changing weather conditions, particularly lightning, strong winds, and unexpected rainfall.
No astronomical image is worth risking injury or exposing expensive camera equipment to dangerous conditions.
5. Camera Settings for Deep-Sky Astrophotography Beginners
Astrophotography camera settings are governed by the interaction between exposure duration, optical aperture, sensor gain, target brightness, and the apparent movement of the sky. There is no single combination that works optimally for every camera and observing location. Beginners should treat recommended settings as starting points, inspect their actual results, and adjust exposure parameters systematically.
Setting Up Manual Exposure Mode
Manual exposure mode gives the photographer direct control over the camera’s main exposure parameters.
In astrophotography, this is particularly useful because automatic exposure systems may interpret a predominantly dark image incorrectly.
Set the camera to M, or Manual mode, and configure shutter speed, lens aperture, and ISO independently.
Disable the flash and select RAW capture.
If the camera supports an intervalometer or built-in interval shooting, configure it to record repeated exposures with consistent settings.
A short delay between frames may be necessary for the camera to write data to the memory card.
Automatic changes in shutter speed or ISO can complicate calibration and stacking, so consistency is generally preferable during a sequence.
For interchangeable-lens cameras, verify that the lens is properly mounted and any relevant stabilization settings are appropriate for tripod use.
Take a test exposure and evaluate the resulting stars before committing to a longer sequence.
Choosing the Best Lens Aperture
Lens aperture determines the effective diameter of the opening through which light enters the optical system.
Photographers express aperture using an f-number, such as f/1.8, f/2.8, or f/4.
A lower f-number generally corresponds to a larger opening and greater illumination per unit sensor area for the same scene.
For the same lens and focal length, changing from f/2.8 to f/4 approximately halves the light reaching the sensor during an equal exposure.
However, the widest aperture is not always the best setting for sharp astronomical photographs.
Many photographic lenses exhibit optical aberrations near their maximum aperture, particularly toward the image corners.
These can produce distorted stars, coma, astigmatism, or reduced sharpness.
Stopping down slightly may improve optical quality at the expense of light collection.
For example, a lens with a maximum aperture of f/1.8 might produce cleaner stars at f/2.2 or f/2.8.
Test the actual lens rather than assuming a particular aperture is universally optimal.
Choosing Shutter Speed Without Star Trails
Shutter speed determines how long the camera sensor collects light during each exposure.
Longer exposures collect more astronomical signal, but stars also appear to move across the sensor because of Earth’s rotation.
When using a stationary tripod, excessive exposure duration produces elongated stars or visible star trails.
A traditional guideline is the 500 Rule:
Exposure duration ≈ 500 ÷ focal length
For crop-sensor use, photographers often modify the calculation by incorporating the camera’s crop factor.
However, this rule is only a rough historical approximation.
Modern high-resolution sensors frequently reveal trailing at exposure durations shorter than the rule suggests. Acceptable exposure time also depends on sensor pixel size, celestial declination, image magnification, and individual tolerance for elongated stars. [9]
For example, five seconds at 24mm can be a conservative starting test for many untracked setups, although it is not a guaranteed maximum.
Capture several trial photographs at different durations and inspect bright stars at full magnification.
Choose the longest exposure that produces acceptably round stars for your intended image.
Selecting the Right ISO Sensitivity Setting
ISO controls how the camera represents and amplifies the signal recorded by its image sensor.
Increasing ISO does not cause more photons to enter the camera.
Instead, it changes the relationship between the captured sensor signal and the recorded image values.
Different cameras have different read-noise behavior, dynamic-range characteristics, and gain architectures.
Consequently, the best ISO depends on the particular sensor and imaging conditions.
A range of ISO 800–3200 can be useful for initial testing with many consumer DSLR and mirrorless cameras.
ISO 1600 is a reasonable example starting point, but it should not be treated as universally optimal.
Very high ISO settings may reduce highlight headroom and cause bright stars or nebular cores to clip.
Conversely, an ISO that is too low for a particular camera and exposure strategy may make read noise more significant in the recorded data.
Compare test exposures by examining star detail, background levels, and highlight preservation rather than judging quality solely from screen brightness.
Why You Should Photograph in RAW Image Format
RAW image files preserve camera sensor data with greater processing flexibility than ordinary JPEG photographs.
JPEG files are typically processed inside the camera, including operations such as tone adjustment, white-balance application, sharpening, noise reduction, and lossy compression.
Those adjustments may remove or alter subtle astronomical information.
RAW files generally preserve more of the original sensor measurements, allowing greater control over calibration, color correction, and image stretching.
Common file formats include Canon CR3, Nikon NEF, Sony ARW, and Adobe DNG.
For deep-sky imaging, preserving the original data is especially valuable because faint astronomical structures may initially occupy a narrow range of pixel brightness values.
RAW files can be substantially larger than JPEGs, so ensure your memory card and computer have sufficient storage.
For the most reliable stacking results, avoid mixing differently processed JPEGs with RAW light frames.
Achieving Sharp Stars With Manual Focus
Accurate focus is one of the most important requirements for successful deep-sky astrophotography.
Autofocus systems may struggle under extremely low illumination because faint astronomical objects provide insufficient contrast.
The infinity symbol on a lens is also not always a reliable indicator of precise astronomical focus.
To focus manually, select a bright star and display it using magnified live view.
Adjust the focus ring slowly until the star appears as small and sharp as possible.
Check several stars rather than relying on only one, particularly if your lens exhibits field curvature or corner aberrations.
After focusing, take a short test exposure and inspect it at full magnification.
Be careful not to move the focus ring while adjusting framing.
Temperature changes can alter focus slightly, especially during long sessions.
If you notice progressive softness, stop the imaging sequence and verify focus again.
For your first session, spending several additional minutes achieving proper focus is usually more valuable than collecting many poorly focused photographs.
Understanding Earth’s Rotation and Star Trailing
Earth rotates approximately once per sidereal day, causing celestial objects to appear to move across the sky.
The sidereal day is approximately 23 hours, 56 minutes, and 4 seconds.
Because a stationary camera does not follow this movement, stars gradually shift across the image sensor.
The resulting effect is called star trailing.
Star trailing becomes more noticeable as focal length increases, individual exposure duration grows, and the image is examined at higher magnification.
Declination also matters because stars near the celestial equator generally move farther across the sky per unit time than stars near the celestial poles.
A short, wide-field exposure may therefore produce acceptably round stars even without tracking.
With a properly aligned star tracker, longer exposures become possible.
However, tracked images can still show elongated stars if the mount is poorly aligned, improperly balanced, or mechanically unstable.
Differentiate trailing from poor focus by examining whether stars appear consistently elongated in a common direction or simply enlarged and soft.
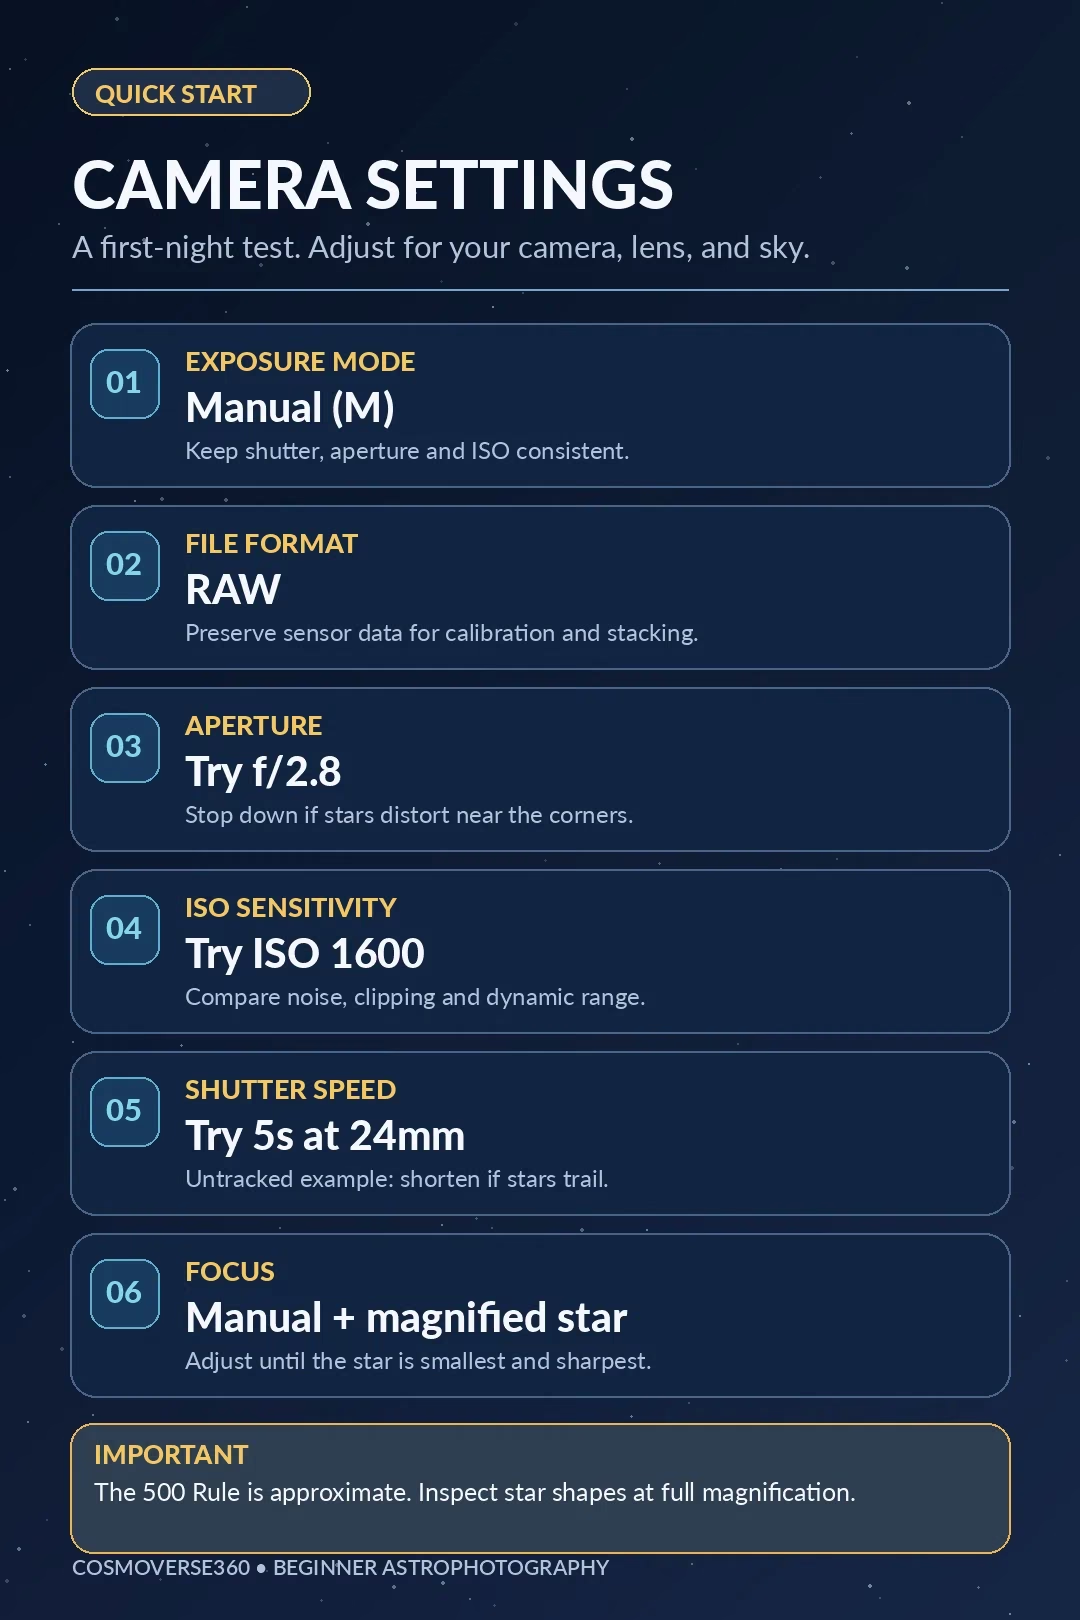
Example Camera Settings for a First Test
The following settings provide a practical starting point for someone using a conventional DSLR or mirrorless camera with a 24mm lens on a stationary tripod. They are intended to help establish a usable baseline rather than define an ideal configuration. Actual results depend on sensor characteristics, optical performance, sky brightness, target declination, and the photographer’s acceptable level of star trailing.
| Camera setting | Example starting point | Adjustment |
|---|---|---|
| Exposure mode | Manual | Keep settings consistent |
| File format | RAW | Avoid unnecessary compression |
| Aperture | f/2.8 | Adjust for sharpness |
| ISO | 1600 | Test against noise and clipping |
| Shutter speed | 5 seconds at 24mm | Reduce if stars elongate |
| Focus | Manual | Magnify a bright star |
| Trigger | Timer or intervalometer | Minimize vibration |
| White balance | Fixed setting | Final color adjusted during RAW processing |
| Image stabilization | Follow lens/camera tripod guidance | Test if uncertain |
With a longer focal length, you may need substantially shorter exposures when imaging without tracking.
A tracker can permit longer exposures, but tracking accuracy, polar alignment, lens weight, and focal length still determine practical limits.
6. How to Capture Your First Deep-Sky Images Step by Step
Once your equipment is assembled and camera settings are configured, the next objective is collecting multiple sharp exposures of the same astronomical target. This stage is often called image acquisition. Good acquisition technique emphasizes accurate framing, consistent settings, correct focus, and sufficient total exposure time. The quality of the final photograph largely depends on the quality of the original light frames.
Framing and Composition of Your Target
Framing determines where the astronomical subject appears within the image and how much surrounding sky is included.
Unlike daytime photography, a deep-sky object may be almost invisible through the camera’s live-view display.
Use planetarium software to estimate the target’s position relative to recognizable stars.
Begin with a reasonably wide field of view and use bright-star patterns to confirm that the camera is pointing in the correct direction.
Once the target is identified, refine the composition.
An object does not always need to be centered. Leaving space around a nebula or star cluster can produce a more balanced photograph.
However, image stacking may require cropping along the edges because individual frames shift slightly relative to one another.
For this reason, avoid positioning important features directly against the image border.
A successful first composition should prioritize keeping the entire target visible over attempting elaborate artistic framing.
Taking and Evaluating a Test Exposure
A test exposure is a single photograph used to evaluate the camera’s setup before beginning a longer imaging sequence.
Take one RAW photograph using the selected aperture, ISO, and shutter speed.
Review the image at high magnification, paying particular attention to the shapes of bright stars.
If stars appear elongated, reduce the shutter duration or investigate camera movement.
If stars are uniformly soft, refocus carefully.
Check the target’s position within the frame. For faint galaxies and nebulae, the object may require a temporary preview stretch before it becomes obvious.
Inspect the brightest regions for clipping.
The sky background should generally retain useful tonal information rather than being severely overexposed.
Do not assume that a dark-looking test image is unusable.
Faint astronomical data frequently becomes visible after stacking and image stretching.
Change one parameter at a time and repeat the test until the main technical problems have been addressed.
Capturing Light Frames
A light frame is an exposure containing the astronomical target along with the sky background and the camera’s instrumental signal.
These frames form the principal photographic data used to create the finished image.
Instead of relying on one exposure, capture a consistent sequence using the same aperture, ISO, focal length, and shutter duration.
An intervalometer can automate this process and reduce the need to touch the camera repeatedly.
For a beginner using an untracked tripod, short exposures are usually necessary to keep stars reasonably sharp.
As the sky moves, the target will gradually drift across the camera’s field of view.
Monitor this drift and gently reframe the camera when necessary.
If the camera has moved significantly, confirm that stars are still sharply focused.
After the session, inspect your light frames and exclude photographs affected by clouds, major tracking errors, vibration, or accidental camera movement.
The quality of accepted exposures matters more than retaining every frame.
Understanding Total Integration Time
Total integration time is the combined exposure duration of the accepted light frames used to build the final image.
It is calculated by multiplying the duration of each exposure by the number of exposures, assuming all frames have the same shutter time.
Integration Time = Exposure Duration × Number of Accepted Frames
For example:
120 exposures × 5 seconds = 600 seconds
That equals 10 minutes of total integration time.
If you capture 360 usable five-second exposures, your integration time increases to 30 minutes.
For untracked astrophotography, many short exposures can provide meaningful total light collection while limiting trailing within individual photographs.
However, a large number of very short exposures is not always equivalent in performance to fewer longer exposures with the same total integration time.
Each frame introduces sensor read noise, so exposure duration and camera noise characteristics remain important.
A practical beginner objective is to capture as much high-quality integration time as conditions permit, rather than chasing a rigid exposure-count target.
Improving Signal-to-Noise Ratio (SNR)
Signal-to-noise ratio, abbreviated SNR, describes the strength of useful astronomical information relative to unwanted statistical variations.
The signal originates from photons arriving from stars, galaxies, or nebulae.
Noise can arise from photon arrival statistics, electronic readout, thermal effects, and other sources.
A single short exposure may contain only a faint astronomical signal mixed with substantial noise.
When multiple photographs are accurately aligned and combined, random fluctuations can average out while the repeated astronomical signal becomes more reliable. [10]
Under simplified conditions involving comparable independent exposures, signal-to-noise ratio improves approximately with the square root of the number of frames.
For example, combining 100 similar exposures can produce roughly ten times the SNR of one exposure when the assumptions of the model apply.
Real results depend on sky background, sensor read noise, calibration quality, and other factors.
Stacking cannot eliminate severe star trailing, recover completely clipped highlights, or restore detail lost through inaccurate focus.
The most effective strategy is to capture clean, sharp data before relying on software.
7. Understanding Calibration Frames Before Stacking
Calibration is the process of correcting instrumental effects in astronomical image data. Digital cameras introduce unwanted signals, and optical systems may illuminate the sensor unevenly. Calibration frames help measure and compensate for these problems. Although beginners can initially learn by stacking light frames alone, understanding calibration is important for producing increasingly accurate and consistent deep-sky photographs.
What Are Calibration Frames?
Calibration frames are reference exposures used to characterize unwanted features introduced by the imaging system.
Common problems include dark-current signal, hot pixels, electronic readout offsets, dust shadows, and vignetting.
The three traditional calibration categories are dark frames, flat frames, and bias frames.
Each serves a different purpose.
Dark frames characterize camera-generated signals recorded without incoming light.
Flat frames measure uneven illumination across the field.
Bias frames measure the camera’s electronic offset and some repeatable readout characteristics.
Calibration is performed before or during the image preprocessing workflow according to the software’s requirements.
However, not every setup or preprocessing method requires every calibration-frame category.
Siril, for example, documents several approaches involving physical master frames, synthetic bias values, and different calibration sequences. [13][15]
Beginners should understand the purpose of each frame before combining them.
Incorrect calibration can damage the image rather than improve it.
How Dark Frames Help Correct Sensor Artifacts
A dark frame is captured while preventing external light from reaching the sensor.
It contains unwanted signal from sources such as dark current, hot pixels, and certain electronic patterns.
For conventional calibration, dark frames should closely match the light frames in exposure duration, ISO or gain, and sensor temperature.
The camera’s lens cap or another suitable light-tight cover prevents light contamination.
A collection of dark frames is combined into a master dark, which is then used to correct repeatable unwanted signal in the light frames.
Temperature matching is particularly difficult with ordinary DSLR and mirrorless cameras because their sensors are not usually actively cooled.
Poorly matched dark frames may introduce calibration errors.
Siril documents methods for handling camera-generated dark signal and emphasizes the importance of choosing a suitable processing procedure. [13]
Do not assume that simply capturing a handful of dark frames will improve every image.
For a first session with very short exposures, it may be reasonable to begin with light-frame stacking and learn calibration separately.
Using Flat Frames to Correct Uneven Illumination
Flat frames measure how evenly light reaches the camera sensor through the optical system.
Two common problems are vignetting, which causes darker image corners, and dust shadows, which may appear as diffuse spots.
To capture flats, photograph a uniformly illuminated field while maintaining the same optical configuration as the light frames.
The lens, focus position, aperture, camera orientation, and any filters should remain unchanged where relevant.
Flat exposures should be bright enough to provide reliable measurements without saturating the sensor.
Multiple flats are typically combined into a master flat after appropriate calibration.
The master flat is then used to correct uneven illumination in the astronomical exposures.
Flat frames become especially valuable when strong vignetting is visible or when the imaging system contains dust near an optical surface that produces noticeable shadows.
Changing the focus or optical configuration before capturing flats may reduce their effectiveness.
Understanding Bias Frames and Readout Offset
A bias frame, sometimes called an offset frame, is a dark exposure captured using the camera’s shortest practical shutter duration.
It measures the baseline electronic offset and repeatable characteristics associated with the image readout.
Bias correction is important because calibration operations must distinguish real illumination from electronic offset values.
However, a crucial detail is that uncalibrated dark frames already contain the bias offset.
If software subtracts a full master dark and then subtracts the same bias offset again from the light frames, the result can be incorrectly calibrated.
The correct procedure depends on how master darks and master flats were prepared.
Some workflows use separate bias frames. Others employ calibrated darks, dark flats, or synthetic bias values.
Siril provides specific guidance on this distinction, including methods that avoid unnecessary or duplicated offset subtraction. [13][15]
Beginners should select one documented calibration workflow and follow it consistently instead of combining unrelated instructions from different tutorials.
8. How to Stack and Process Your First Deep-Sky Photograph
Capturing exposures is only half of the astrophotography process. Most faint deep-sky structures require digital image processing before they become clearly visible. Astronomical software aligns individual frames, combines their signals, corrects instrumental artifacts, and transforms the image’s brightness distribution. Understanding these operations helps beginners distinguish genuine celestial detail from noise and processing artifacts.
Understanding Image Registration
Image registration is the process of aligning multiple photographs so corresponding stars occupy matching positions.
Even when the camera remains fixed on a tripod, the stars move between exposures as Earth rotates.
When using a tracker, small tracking errors or intentional changes in framing can also introduce differences between frames.
Astronomical registration software detects stars, identifies matching patterns, and calculates the geometric transformations required to align the photographs.
Depending on the workflow, these transformations may include translation, rotation, or more sophisticated geometric corrections.
The software may also assess star sharpness and registration quality.
Frames containing severe distortions or insufficient recognizable stars may fail registration.
After alignment, only the overlapping parts of the registered frames contain consistent coverage.
This is why stacking often creates irregular borders that must be cropped.
Reliable registration is essential because averaging misaligned images produces blurred stars and weakens astronomical detail.
How Image Stacking Reveals Faint Details
Image stacking combines multiple registered exposures to improve the quality of astronomical data.
A common approach averages corresponding pixel values after the frames have been aligned.
Because the astronomical subject appears consistently at the registered positions, its signal is reinforced relative to random fluctuations.
This improves the visibility of faint structures and reduces apparent graininess.
Some stacking methods also reject statistical outliers.
These rejection algorithms can reduce the contribution of temporary artifacts such as satellite trails, airplane lights, or isolated hot pixels when sufficient suitable frames are available.
The result depends on the number and quality of exposures, calibration accuracy, and the selected stacking method. [10]
Stacking should not be confused with inventing or reconstructing details that were never recorded.
It improves information already present in the captured data.
A well-exposed, correctly focused collection of photographs usually produces better results than a larger collection dominated by technical problems.
Getting Started With Siril
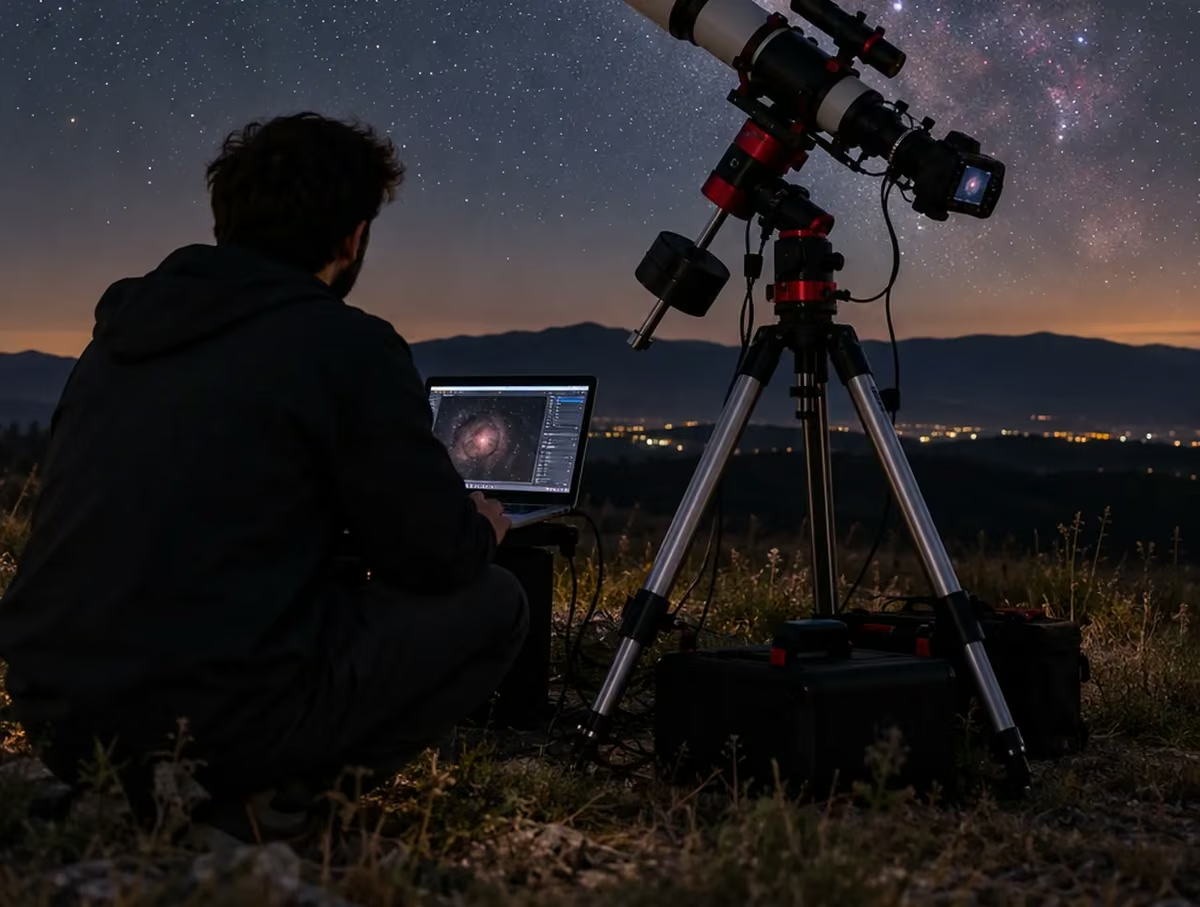
Siril is a free astronomical image-processing application capable of performing calibration, registration, stacking, and additional image-processing operations.
It provides a useful workflow for beginners who want to turn DSLR or mirrorless RAW images into a processed deep-sky photograph.
Siril’s official beginner tutorial explains a folder-based preprocessing approach. [12]
Create a project directory with the following folders:
first-deep-sky-project/
    lights/
    darks/
    flats/
    biases/
Place the corresponding RAW files in their designated directories.
Do not mix JPEG files or unrelated images into the RAW input folders used by a preprocessing script.
Next, open Siril and set the project directory as the working directory.
Choose a preprocessing script that matches your camera type and the calibration data you actually collected.
The standard OSC_Preprocessing workflow expects the required calibration folders and files, so it should not be selected blindly when those files are missing.
If you captured lights only, use an appropriate lights-only workflow or follow Siril’s manual processing instructions.
After successful preprocessing, Siril creates a registered and stacked result.
The initial image may appear almost black because astronomical data is often retained in a linear form.
This is expected. The next stage involves stretching the image to reveal its faint details.
Using DeepSkyStacker (DSS) as an Alternative
DeepSkyStacker, commonly abbreviated DSS, is another astrophotography stacking application.
It is particularly familiar to photographers who want a straightforward workflow for registering and combining many exposures.
DSS supports importing light frames and appropriate calibration images, detecting stars, aligning exposures, and producing a stacked image.
Its basic workflow includes importing the photographs, registering checked images, reviewing stacking settings, and generating a combined result.
Although older tutorials often describe DSS as Windows-only software, official releases beginning with version 6.1.0 added support for macOS and Linux. Current releases therefore offer more platform choices than traditional guides suggest. [16]
Siril generally provides a broader integrated workflow for both stacking and advanced image processing.
DSS can also be used for stacking, with additional adjustments performed in other image-editing software.
| Feature | Siril | DeepSkyStacker |
|---|---|---|
| Primary purpose | Astronomical preprocessing and image processing | Astronomical registration and stacking |
| RAW image support | Yes | Yes |
| Calibration frames | Supported | Supported |
| Image registration | Supported | Supported |
| Stacking | Supported | Supported |
| Advanced astronomical processing | Extensive integrated tools | More limited emphasis |
| Platforms | Windows, macOS, Linux | Windows, macOS, Linux in supported current releases |
Choose whichever program best fits your operating system and learning preferences.
For a complete beginner workflow that continues beyond stacking, Siril is a strong starting choice.
Reading an Image Histogram
An image histogram displays how pixel values are distributed across brightness levels.
In a conventional histogram, darker values appear toward the left, midtones occupy the central region, and brighter values appear toward the right.
Deep-sky RAW images often contain most of their pixel values within a relatively narrow dark range.
This does not necessarily indicate that the photographs lack useful information.
The astronomical signal may simply occupy a small portion of the available tonal range.
Two important histogram problems are black clipping and highlight clipping.
Black clipping occurs when dark pixel values are forced to the minimum, potentially erasing faint structures.
Highlight clipping occurs when bright values reach the maximum representable level, losing information in bright stars or nebular cores.
Astrophotography processing frequently involves redistributing brightness values while preserving both faint and bright regions.
Learning to read the histogram makes these adjustments more controlled and helps prevent excessive contrast or unnatural backgrounds.
Image Stretching: Revealing Hidden Galaxies and Nebulae
Image stretching is the process of transforming image brightness values so faint astronomical structures become visible.
A linear stacked image often appears very dark because its recorded light values have not yet been adjusted for a visually useful display.
Stretching applies a nonlinear transformation that enhances the visibility of faint signals without simply multiplying every pixel equally.
This can reveal the outer regions of galaxies, extended nebulae, and delicate interstellar dust.
However, aggressive stretching also amplifies the appearance of noise and may produce excessively bright stars.
If the stretch is too strong, bright cores can lose detail while the background becomes uneven or unnatural.
A controlled approach is to apply several moderate adjustments, reviewing the histogram and the image after each step.
Siril provides tools for tonal transformations and astronomical image enhancement. [14]
The goal is to reveal genuine recorded detail while retaining a believable distribution of brightness across the photograph.
Correcting Color Balance and Light-Pollution Gradients
Deep-sky photographs can contain unwanted color casts and brightness gradients caused by artificial lighting, moonlight, atmospheric conditions, and camera response.
A gradient appears when the background becomes brighter or differently colored across one portion of the image.
This can make faint nebulae or galaxy structures harder to distinguish.
Astronomical processing software can model and subtract an unwanted background gradient.
However, gradient removal requires care.
If the software treats a large faint nebula as part of the background, it may remove genuine astronomical signal.
Color calibration is another important operation.
Camera sensors and color filters do not reproduce astronomical colors automatically with perfect accuracy.
Where supported, photometric color calibration can use astronomical reference data and star-color information to help establish a more physically grounded color balance.
Avoid increasing saturation solely to make the photograph look more dramatic.
The best result preserves meaningful astronomical structures without introducing unnecessary processing artifacts.
Building a Repeatable Post-Processing Workflow
A repeatable post-processing workflow makes it easier to understand why one image succeeds and another does not.
Instead of applying random adjustments, follow a consistent sequence and save intermediate results.
A useful beginner workflow is:
- Transfer and organize the original RAW files.
- Inspect the light frames and reject unusable exposures.
- Apply suitable calibration when calibration data is available.
- Register the acceptable light frames.
- Stack the registered images.
- Crop irregular borders produced by alignment.
- Remove unwanted background gradients.
- Perform suitable color calibration.
- Stretch the linear image to reveal faint structures.
- Make restrained contrast, saturation, and noise adjustments.
- Export the final image.
The exact order of some operations may vary according to the software and chosen method.
Keep a high-bit-depth master file, such as an appropriate FITS or TIFF, for future editing.
Export a separate JPEG or PNG for ordinary web sharing.
Applications such as GIMP or Adobe Photoshop can be used for additional finishing adjustments when necessary.
Saving intermediate processing stages is especially useful because it allows you to identify which operation introduced an unwanted effect. [14]
9. Your First Night Under the Stars: A Practical Imaging Plan
A first astrophotography session should be organized around realistic objectives rather than technical perfection. The following plan brings together target selection, equipment preparation, camera setup, exposure capture, and post-processing into one manageable experience. By following an organized sequence, beginners can reduce avoidable mistakes and concentrate on collecting their first usable deep-sky image.
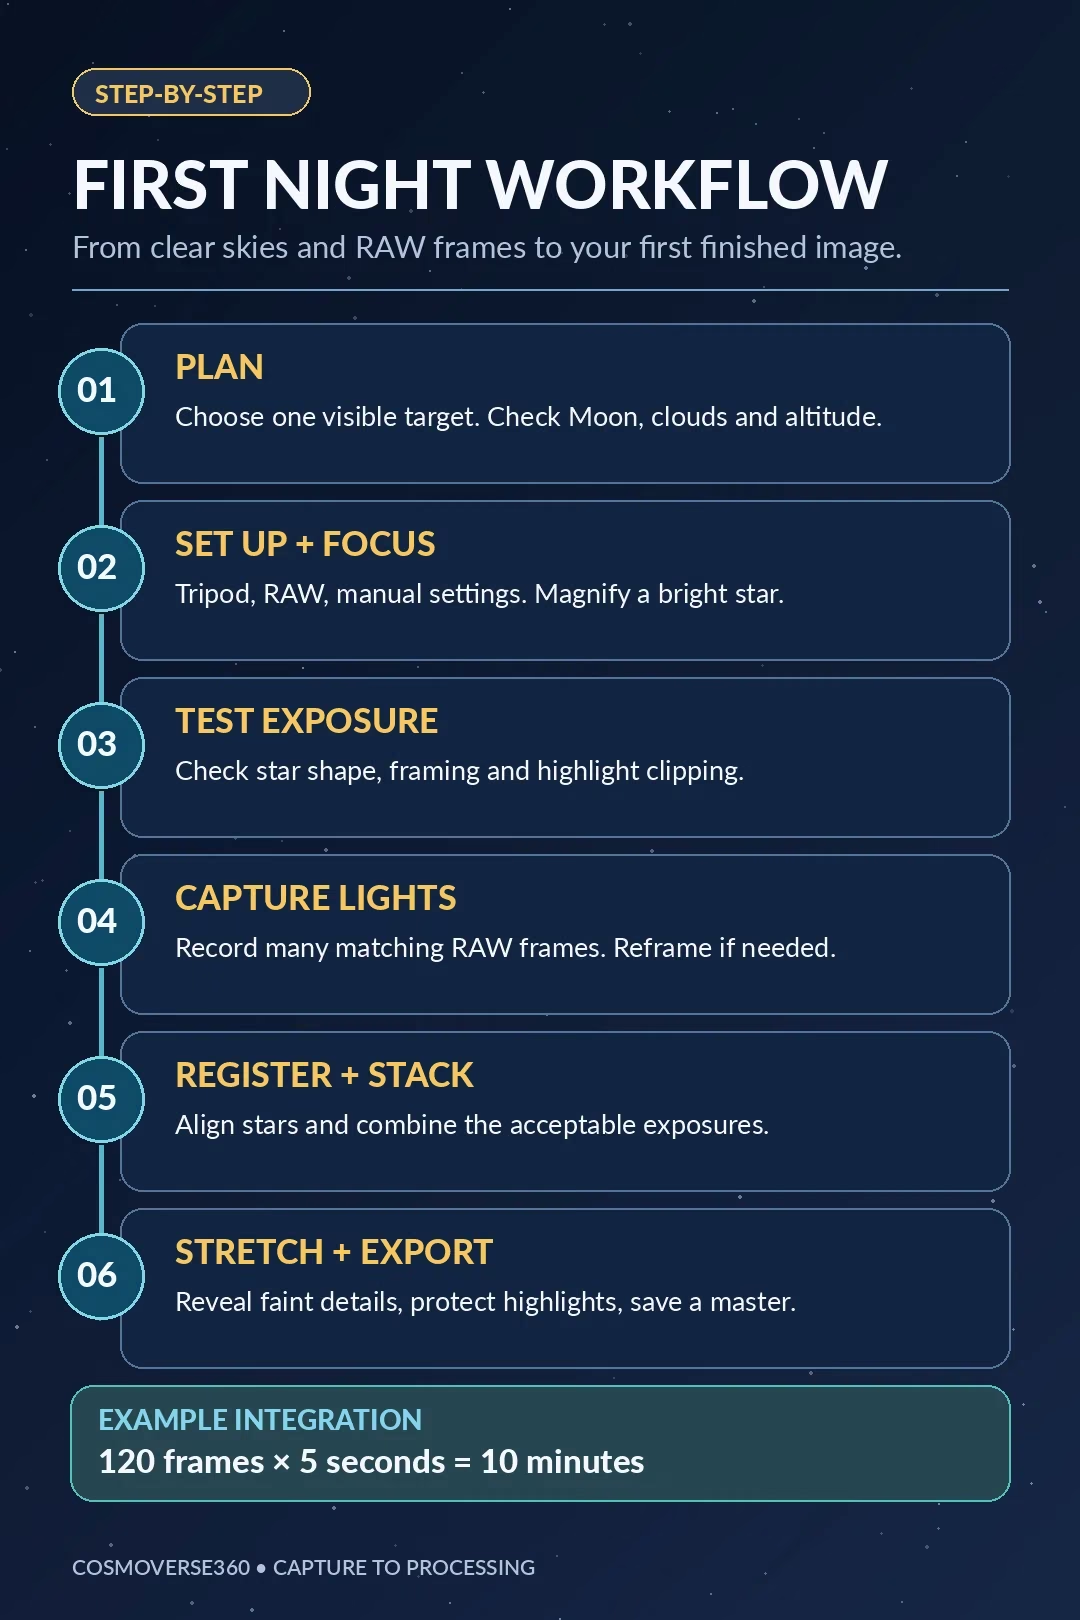
Before Leaving Home
Preparation begins with confirming that the selected deep-sky target will be visible from your intended observing location.
Use planetarium software to identify the target’s position during your planned session.
Next, examine the Moon’s phase and position, forecast cloud cover, atmospheric transparency, and potential weather hazards.
Choose one primary target and identify a simpler alternative in case the original becomes obstructed.
Check that your camera and lens operate correctly before traveling.
A first-night checklist should include the following:
- [ ] Camera and suitable lens
- [ ] Stable tripod and secure camera mounting plate
- [ ] Fully charged batteries and spare power
- [ ] Empty or sufficiently large memory card
- [ ] Intervalometer or supported interval-shooting method
- [ ] Red-light headlamp
- [ ] Lens hood or dew-prevention equipment
- [ ] Warm or weather-appropriate clothing
- [ ] Charged phone and safe travel arrangements
- [ ] Star tracker and required accessories, if applicable
A simple checklist prevents avoidable equipment problems and reduces the chance of arriving at a dark location without something essential.
Arriving at the Observing Location
After reaching the observing location, inspect the ground and choose a stable position away from unnecessary artificial lighting.
Set up the tripod and confirm that its legs and mounting connections are secure.
Attach the camera and lens.
If you are using a star tracker, complete its mounting, balancing, and polar-alignment procedures before framing your target.
For an ordinary tripod, no polar alignment is required.
Switch the camera to manual exposure mode and select RAW capture.
Configure an initial aperture, shutter speed, and ISO based on your lens and tracking setup.
Next, locate a bright star and focus using magnified live view.
Do not rush this stage.
A properly focused camera with moderate exposure settings is more valuable than a perfectly planned target photographed out of focus.
Starting Your First Imaging Session
Locate the selected astronomical target using the planetarium display and nearby recognizable stars.
Frame the object, allowing adequate space around it for later cropping.
Take a test exposure and inspect its star shapes, focus accuracy, and overall brightness distribution.
If the stars are elongated, shorten the shutter speed or correct the tracking or vibration problem.
Once the setup produces acceptable test images, begin the light-frame sequence.
For example, an untracked beginner might capture 120 five-second exposures, producing ten minutes of nominal integration time if every frame is usable.
This example is not a universal requirement.
Continue collecting exposures as long as the target remains suitably positioned and observing conditions permit.
Monitor battery charge, dew formation, clouds, and gradual target drift.
If necessary, pause to reframe the camera and confirm that the focus remains correct.
Completing the Session
Before packing away the equipment, verify that the camera saved the expected images successfully.
Review a selection of exposures from the beginning, middle, and end of the session.
This helps identify whether focus shifted or the target moved outside the field of view.
Record the target name, exposure duration, aperture, ISO, approximate observing time, location, and relevant sky conditions.
If your chosen workflow requires calibration frames, capture them using the appropriate settings and procedures.
Remember that flats must preserve the optical configuration used for the light frames where that configuration affects illumination.
Carefully pack the equipment and confirm that no accessories remain on the ground.
After returning home, create a backup of the original RAW files before making edits or deleting unwanted photographs.
Keeping the untouched originals allows you to repeat the processing later as your skills improve.
Processing the Images the Next Day
Begin by transferring the photographs into a clearly named project directory.
Separate light frames from any calibration data.
Inspect the photographs and exclude exposures with severe movement, clouds, poor focus, or significant star trailing.
Open Siril or another suitable stacking program and select the appropriate preprocessing workflow.
Apply calibration if usable calibration frames are available.
Register and stack the accepted images.
After stacking, crop incomplete borders and examine the combined photograph.
The image may initially appear extremely dark.
Apply a controlled stretch to reveal the faint astronomical subject.
Correct obvious color casts or background gradients without removing real structures.
Finally, export a shareable image and preserve the high-quality stacked master.
Evaluate the result by asking which aspect needs the most improvement: focus, tracking, exposure collection, framing, sky conditions, or processing.
10. Common Beginner Astrophotography Problems and How to Fix Them
Technical problems are a normal part of learning deep-sky astrophotography. Blurred stars, invisible targets, noisy backgrounds, and unexpected gradients can occur even when the equipment appears to be operating correctly. Identifying the underlying cause is more productive than making arbitrary adjustments. Most beginner problems can be diagnosed by examining the original exposures before changing the stacking or editing workflow.
Why Are My Stars Blurry or Stretched?
Blurred stars can result from inaccurate focus, camera vibration, optical aberrations, or atmospheric conditions.
Elongated stars may instead indicate excessive untracked exposure time, poor tracking, or mechanical movement.
To diagnose the problem, inspect several stars across the image.
If stars appear uniformly enlarged or soft, verify manual focus.
If stars are elongated in a similar direction across the frame, consider star trailing or camera movement.
If distortion becomes worse toward the corners, lens aberrations may be responsible.
For an untracked camera, try shortening the shutter duration.
For a tracked setup, examine polar alignment, mount balance, and tracking accuracy.
If only a few frames are affected, remove those photographs from the stacking sequence.
Why Can’t I See My Galaxy or Nebula?
A faint or invisible deep-sky target does not always indicate a camera malfunction.
First, confirm that the object is actually within the photograph’s field of view.
Compare surrounding star patterns with a planetarium chart or use suitable plate-solving software.
Next, check the object’s brightness and angular dimensions.
Some targets have prominent central regions but extremely faint surrounding structures.
Bright moonlight, urban light pollution, haze, and low target altitude can further reduce contrast.
Also consider whether the image is still in a linear, unstretched state.
A galaxy that is barely recognizable in one RAW frame may become more visible after sufficient integration and appropriate stretching.
If the target remains absent, prioritize accurate framing and favorable observing conditions before simply increasing ISO.
Why Are My Images Grainy?
Grainy astronomical photographs usually contain insufficient signal relative to the noise present in the image.
Noise can result from photon arrival statistics, electronic readout, dark current, and other sensor-related effects.
Short exposures taken under bright skies may contain little usable information from a faint target.
Image stacking improves SNR by combining multiple exposures, but it does not eliminate all sources of noise.
If the photograph remains extremely noisy, increasing accepted integration time may produce a more substantial improvement than aggressive software denoising.
Also review whether the chosen individual exposure duration creates unnecessary read-noise penalties.
Poor calibration, excessive stretching, and strong background gradients can make noise appear worse.
Apply noise reduction conservatively because aggressive filtering can remove genuine faint astronomical structures alongside unwanted fluctuations.
Why Are the Corners of My Image Dark or Distorted?
Dark image corners are frequently caused by vignetting, where the optical system delivers less illumination near the edge of the sensor.
Distorted stars near the corners may indicate optical aberrations such as coma or astigmatism.
These are different problems and require different solutions.
Flat-frame calibration can help correct uneven illumination and certain dust shadows.
However, flats cannot restore optical sharpness or correct severe lens aberrations.
Stopping down the lens may improve corner star shapes, although it reduces the light collected during an equal exposure.
Check whether the problem appears in individual RAW files or emerges after processing.
If a gradient changes direction across the image, light pollution or background correction may also be contributing.
Understanding the difference between optical and processing errors prevents unnecessary equipment changes.
Why Does My Stacked Image Look Almost Black?
A nearly black stacked image is common and does not necessarily mean the stacking operation failed.
Astronomical stacking software often preserves image data in a linear representation.
In that state, faint signals can occupy a small range of brightness values and remain difficult to see on an ordinary display.
Inspect the histogram and use a suitable preview stretch to determine whether the target is present.
A nonlinear image stretch can reveal faint structures by redistributing recorded brightness values.
However, avoid forcing dark pixels to pure black too early.
Doing so can permanently discard faint astronomical information.
Likewise, excessive stretching can clip bright stars and amplify background noise.
If the stacked image contains recognizable stars and a detectable target, careful tonal processing may be all that is required to reveal the result.
Why Are My Camera Lens and Equipment Becoming Wet?
Moisture can accumulate on camera equipment when exposed surfaces cool below the surrounding air’s dew point.
This is particularly common during humid or calm nighttime conditions.
The front lens element may develop a thin layer of condensation that is not immediately obvious in darkness.
Affected images often appear hazy, with reduced sharpness or unusual halos around bright stars.
Use a suitable lens hood and consider a controlled dew heater for repeated problems.
Check the lens periodically throughout the session.
Avoid exposing vulnerable equipment to precipitation and do not leave wet electronic connections unprotected.
If significant condensation forms inside equipment, or if rain or electrical hazards become a concern, stop the session and protect the camera.
A shorter session with clean optics is more productive than collecting hundreds of photographs through a fogged lens.
11. How to Improve After Your First Successful Deep-Sky Photograph
The greatest improvement in beginner astrophotography often comes from better technique rather than purchasing additional equipment. Once you have completed a photograph, you can begin comparing results, identifying limitations, and refining your workflow. More accurate focusing, improved sky selection, longer integration time, and consistent processing can produce substantial gains before a major equipment upgrade becomes necessary.
Improve Your Results Before Buying More Equipment
Review your first photograph and identify the most obvious limitation.
If stars appear soft, improve focusing technique.
If they are elongated, refine shutter duration or tracking accuracy.
If the photograph is noisy, investigate exposure strategy, total integration time, and observing conditions.
If faint outer structures remain invisible, consider photographing the same target from a darker location.
Repeat the session using similar equipment so you can compare results meaningfully.
Keep a simple imaging log that records camera settings, accepted frame counts, environmental conditions, and processing methods.
This helps distinguish genuine improvements from differences caused by changing circumstances.
Experiment with aperture and ISO, but change one variable at a time.
Learning how your existing camera behaves under different conditions is often more valuable than immediately replacing it.
Progress From Untracked to Tracked Astrophotography
After mastering short-exposure photography from a stationary tripod, you may encounter limitations that make tracking equipment attractive.
Longer focal lengths magnify apparent star movement, restricting the shutter duration available without trailing.
A star tracker compensates for Earth’s rotation, making longer individual exposures possible.
This can be particularly beneficial when attempting to photograph faint astronomical objects with moderate telephoto lenses.
However, tracking introduces its own challenges.
You must understand polar alignment, mounting balance, tripod stability, and the operating limits of the device.
Start with a familiar lens and relatively modest exposure durations.
Once the tracker consistently produces sharp stars, increase exposure duration gradually and evaluate the results.
A tracker should be considered a progression in technique, not a substitute for accurate focus, appropriate target selection, or careful image processing.
Explore More Challenging Celestial Targets
After successfully imaging a bright nebula or open cluster, consider gradually expanding your target selection.
Galaxies with lower surface brightness, extended reflection nebulae, and smaller astronomical objects can provide more demanding photographic projects.
When evaluating a new target, consider its brightness, angular dimensions, position in the sky, and the focal length required to record meaningful detail.
Some objects may require longer integration times or darker observing locations than your original targets.
Others may simply be too small for your available lens to resolve clearly.
You can also experiment with combining observations from multiple nights.
This requires careful organization and consistent preprocessing, but it allows total integration time to accumulate beyond a single session.
Improved processing experience may also reveal details that were already present in your earlier photographs.
Create a Repeatable Personal Imaging Workflow
A personal imaging workflow is a documented sequence of decisions and actions that produces consistent results.
Begin by maintaining a checklist for weather forecasts, Moon position, target visibility, and equipment preparation.
Create camera-setting presets for frequently used lens combinations.
Record the shutter speeds that produce acceptably sharp stars with each untracked focal length.
Organize photographs into project folders using target names and observing dates.
Keep calibration frames separate from light frames, and record how each master calibration file was created.
Document the main processing operations you perform in Siril or other software.
Over time, this workflow will reduce setup errors, simplify troubleshooting, and make it easier to compare photographs.
The objective is not to eliminate experimentation, but to establish a reliable foundation upon which more advanced techniques can be tested.
12. Frequently Asked Questions About Deep-Sky Astrophotography for Beginners
Beginners often encounter conflicting advice about equipment, exposure settings, and image-processing methods. Many recommendations depend on the camera, focal length, observing location, or astronomical target rather than applying universally. The following answers clarify the most common questions and emphasize the practical distinctions that matter when planning and completing a first deep-sky photography session.
Can you do deep-sky astrophotography without a telescope?
Yes. Deep-sky astrophotography can be performed using ordinary photographic lenses rather than a telescope.
Bright star clusters, prominent nebulae, and large galaxies are suitable for camera-lens photography when their angular size and brightness match the available equipment.
A DSLR or mirrorless camera with a standard or short telephoto lens can record recognizable deep-sky targets.
A wide-angle lens may also produce attractive compositions of large astronomical regions.
Telescopes become more useful when attempting to photograph smaller objects or resolve fine structures.
For your first session, understanding framing, exposure limitations, focusing, and image stacking is more important than purchasing a telescope.
Can you photograph galaxies with a DSLR and tripod?
Yes. A DSLR and stationary tripod can record some galaxies, particularly large and relatively bright examples such as Andromeda.
The important limitation is the maximum exposure duration that preserves acceptably round stars without tracking.
Use a suitable focal length, accurate focus, RAW capture, and multiple short exposures.
Combine the photographs through registration and stacking.
The resulting image may reveal a galaxy’s bright central region before its fainter outer structures become visible.
Recording extensive spiral detail generally requires more demanding exposure collection, favorable skies, and suitable image scale.
A camera and tripod are sufficient to begin learning galaxy photography, even if they cannot reproduce advanced long-exposure results.
What is the easiest deep-sky object to photograph?
There is no single easiest deep-sky object for every observer.
The ideal target depends on observing latitude, season, camera equipment, sky darkness, and available focal length.
The Pleiades is relatively easy to locate and photograph because of its bright stars.
The Orion Nebula is particularly attractive because its central region is luminous and recognizable.
Andromeda is a good introductory galaxy for observers who can see it at a suitable altitude.
If the objective is simply to capture a recognizable deep-sky target, a bright star cluster may provide the most forgiving experience.
If you want to photograph glowing gas or an external galaxy, M42 or M31 may be more appropriate.
What camera settings should beginners use for deep-sky astrophotography?
Begin with manual exposure mode, RAW file capture, and accurate manual focus.
For a camera with a suitable lens, f/2.8 and ISO 1600 can provide useful initial test settings, but they are not universal recommendations.
Shutter duration should be selected according to focal length, sensor characteristics, target position, and whether tracking is available.
For example, five seconds at 24mm on a fixed tripod is one conservative test configuration.
A shorter or longer duration may be preferable in practice.
The best procedure is to take a test photograph, inspect star shapes and highlight clipping, and adjust settings based on the actual data rather than relying exclusively on published exposure formulas.
How many photos should I take for deep-sky astrophotography?
There is no universal number of photographs required for a successful deep-sky image.
The important quantity is the total amount of useful astronomical signal collected, along with the quality of the accepted exposures.
For example, 120 five-second photographs provide ten minutes of nominal integration time if every exposure is usable.
Capturing 360 five-second photographs increases that total to 30 minutes.
Longer integration generally helps reveal faint structures, subject to the limitations of sky conditions and noise.
However, a hundred blurred photographs are not necessarily more useful than a smaller collection of sharp ones.
Prioritize acceptable focus, correct framing, and consistent exposure quality before increasing frame count.
How long should an astrophotography exposure be without tracking?
The maximum practical exposure duration without tracking depends on focal length, camera pixel scale, celestial declination, and the amount of trailing considered acceptable.
Wide-angle lenses permit longer exposures than telephoto lenses under otherwise similar circumstances.
The traditional 500 Rule provides a rough estimate, but it often allows noticeable trailing with modern high-resolution cameras.
A more reliable method is to begin with a short exposure and increase its duration gradually.
Inspect stars at full image magnification after each change.
If stars become visibly elongated, shorten the exposure.
For a stationary camera, collecting many short exposures and stacking them is generally more practical than attempting a single long exposure. [9]
Do you need dark frames, flat frames, and bias frames?
Dark, flat, and bias frames serve different calibration purposes, but not every beginner workflow requires all three.
Dark frames characterize unwanted sensor-generated signals.
Flat frames correct uneven illumination and certain dust shadows.
Bias frames characterize electronic offset and related readout behavior.
Some preprocessing methods use all three categories, while others use calibrated darks, synthetic bias values, or alternative flat-calibration procedures.
The correct combination depends on camera behavior and the selected software workflow.
For a first experiment, beginners can learn registration and stacking using light frames alone.
As their experience grows, appropriate calibration becomes increasingly useful.
It is important not to subtract the same electronic offset twice. [13][15]
Is Siril better than DeepSkyStacker for beginners?
Both applications can produce useful deep-sky image stacks.
Siril offers integrated tools for calibration, registration, stacking, gradient removal, color correction, and image stretching.
This makes it attractive to beginners who want to learn a complete astronomical image-processing workflow within one application.
DeepSkyStacker provides a familiar registration and stacking approach and can be combined with other editing tools.
Older tutorials describe DSS as Windows-only, but official newer releases also support macOS and Linux. [16]
Neither program automatically guarantees a better image.
Data quality, correct configuration, calibration, and processing decisions strongly influence the result.
For someone learning the entire process from RAW capture to a finished astronomical photograph, Siril is a practical starting recommendation.
Can deep-sky astrophotography be done in a city?
Yes, although light pollution makes many faint deep-sky objects considerably more difficult to photograph.
Urban skyglow increases the background brightness and reduces the contrast of galaxies and nebulae.
Bright stars, prominent open clusters, and the central regions of some luminous objects remain accessible under suitable conditions.
A city photographer should avoid direct artificial lights entering the lens and photograph targets as high above the horizon as practical.
Careful background-gradient correction can improve the final image, but it cannot completely recover contrast lost through severe sky brightness.
Longer total integration may help, although darker locations often offer substantial advantages.
City-based imaging is still valuable for practicing focusing, framing, exposure control, and stacking.
How much total exposure time is needed for a good deep-sky image?
There is no universal integration-time requirement because targets differ greatly in brightness and surface brightness.
A bright star cluster can produce a recognizable image with relatively modest exposure collection.
Faint reflection nebulosity or the outer regions of a galaxy may require significantly more data.
Sky brightness, camera performance, aperture, individual exposure length, and processing choices also influence the result.
Ten or twenty minutes of useful integration can be a meaningful beginner achievement, but should not be interpreted as sufficient for every target.
Increasing integration time generally improves the visibility of faint structures when additional exposures are of comparable quality.
For long-term improvement, prioritize collecting more clean astronomical signal rather than targeting an arbitrary number of minutes.
Why do astrophotographers stack multiple photographs?
Astrophotographers stack multiple photographs to improve the signal-to-noise ratio of their astronomical images.
Each light frame contains useful celestial information mixed with statistical noise and other unwanted effects.
Image-registration software first aligns the stars and corresponding structures across the photographs.
The registered images are then combined using averaging or other stacking methods.
Random noise becomes less prominent relative to the repeated astronomical signal.
With sufficient appropriate data, statistical rejection can also reduce temporary artifacts such as satellite trails.
Stacking makes faint structures easier to reveal during subsequent image stretching.
However, it cannot fully correct severe defocus, missing astronomical signal, or detail destroyed by excessive exposure. [10]
What should I buy first to improve my deep-sky astrophotography?
The best first upgrade depends on the limitation affecting your current photographs.
If your tripod is unstable, a stronger mounting system may provide an immediate improvement.
If your lens is optically poor or extremely slow, a sharper and faster lens might be beneficial.
If light pollution is the main problem, access to darker skies may provide more noticeable gains than a camera replacement.
For photographers already producing sharp untracked images, a star tracker can expand exposure possibilities and make longer focal lengths more practical.
Before purchasing anything, inspect your existing results.
A clear diagnosis of the limiting factor will produce a more useful upgrade decision than buying equipment based solely on specifications or marketing claims.
Conclusion: Your First Deep-Sky Photograph Is the Beginning
Deep-sky astrophotography is one of the most rewarding ways to explore the night sky.
It transforms faint points and patches of light into photographs of distant galaxies, stellar nurseries, and clusters containing stars far beyond our solar system.
More importantly, it makes astronomical observation an active learning experience.
Every imaging session introduces practical lessons about Earth’s rotation, light pollution, camera optics, exposure strategy, and the relationship between astronomical signal and noise.
You do not need to begin with an expensive telescope or a complicated observatory.
A conventional camera, a stable tripod, a suitable lens, and access to a reasonably clear sky can provide everything required to start.
Your first photograph may contain only the brightest portion of a nebula or the central glow of a galaxy.
That is still a meaningful achievement.
Over time, improved focus, better target planning, longer integration time, appropriate calibration, and more confident image processing can reveal increasingly subtle details.
Your first-night challenge is simple: choose one achievable deep-sky object, photograph it with the equipment you have, stack the usable exposures, and complete your first processed astronomical image.
The result is more than a photograph. It is light that has traveled through space, recorded by your own camera, and transformed into a visible record of the universe.
Sources
The following sources support the astronomical descriptions, target characteristics, observing guidance, camera-exposure principles, tracking procedures, and image-processing recommendations presented in this guide. NASA provides object-specific astronomical information, while the astronomy publications and official software documentation explain the practical imaging methods. Software features and compatibility information should always be checked against the installed version because processing interfaces and supported platforms can change.
Astronomical objects and sky conditions
[1] NASA Science. Hubble’s Messier Catalog.
[2] NASA Science. Messier 42: The Orion Nebula.
[3] NASA Science. Messier 31: The Andromeda Galaxy.
[4] NASA Science. Messier 45: The Pleiades.
[5] John E. Bortle, Sky & Telescope. Introducing the Bortle Dark-Sky Scale.
[6] NASA Science. Moon Phases.
[7] Stellarium Project. Official Stellarium User Guide.
[8] Astrospheric. Astronomical Forecast and Sky Conditions.
Exposure control and imaging techniques
[9] Richard S. Wright Jr., Sky & Telescope. Astrophotography: How Long Can You Go?.
[10] Sky & Telescope. Astrophotography: Stacking Up Your Signal.
[11] iOptron. SkyGuider Pro Camera Mount Official Manual.
Calibration, stacking, and processing software
[12] Siril Project. First Steps: Pre-processing With Scripts.
[13] Siril Project. Manual Pre-processing.
[14] Siril Project. Full Image Processing.
[15] Siril Project. Synthetic Biases.
[16] DeepSkyStacker Developers. Official Releases and Platform Compatibility.
[17] DeepSkyStacker. Official User Manual.
Research and technical review: October 2026. Equipment examples and exposure values are illustrative starting points, not universal camera settings.